Advantages at a Glance: Speed, Precision, Completeness
In the competitive speed-driven manufacturing environment of today’s consumer electronic device market, extreme speed and accuracy are mandatory. However, the complexity of shapes and details on the devices create a major speed bump on the road to rapid CAD models.
3D laser scanning overcomes these challenges with its ultra-fast non-contact collection capability; a laser scanning system can gather many thousands of points per second with phenomenal accuracy and detail. The laser digitizes exactly what it sees, so free-form shapes are no obstacle to fast, precise data collection. In addition, 3D laser scanning technology is non-contact which means that soft materials, such as clay prototype models and push buttons will not be compressed when being measured, and tight spaces on small parts are not a constraint in gaining access. All laser scanning requires is an unobstructed line-of-sight and it can measure anything no matter what the size, shape, or level of complexity.
Electronic communications devices are notoriously difficult to digitize. Their free-form shapes and irregular curves create one of the most challenging problems in product design and re design, and in their aftermarket accessories as well. Over the course of its 25 years in the metrology business, Laser Design Global Services has accrued much experience with scanning all types of small electronic devices and their accessories. Larry Carlberg, Laser Design Service Bureau Manager, noted, “We have done many small electronic devices over the years, so our metrologists are specialists in applying laser scanning for proven results.” Since laser scanning captures the real manufactured geometry, it reveals deviations when compared to the CAD ideal. “Depending on what the customer wants, our modelers can average the deviation between the two sides and create symmetry in the part,” continued Carlberg. “We can adjust the model any way that is necessary to implement the best solution for the customer’s needs.”
Many times, customers have been frustrated trying to measure and document the small, detailed profiles of their electronic devices. Carlberg commented, “3D laser scanning is still relatively unknown in the field. In some instances customers have wasted much time in trying futile approaches to capture the geometry of their as-built parts. Laser scanning can deliver what they need on a very truncated timeline. Customers are always impressed with the complete surface capture, tremendous cost savings, very fast and accurate scanning.”
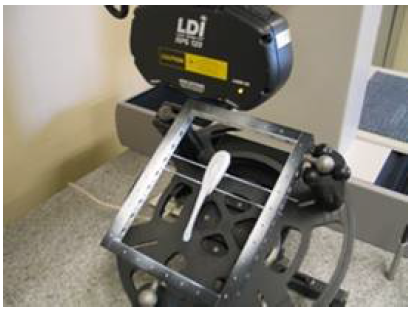
Capturing the free-form shapes and irregular surfaces of consumer electronic products is a prime application for non- contact laser scanning. The laser scanning system projects a line of laser light onto a part’s surface while cameras continuously triangulate the changing distance and profile of the laser line as it sweeps along. The scan picks up the entire view the laser “sees” thereby eliminating the problem of missing data on an irregularly shaped surface. The system measures details and complex free-form geometry so that the object can be exactly replicated digitally. Laser scanners measure articles quickly, picking up to 75,000 coordinate points per second, and they generate huge numbers of data points without the need for templates or fixtures.
First Article Inspection: Increased Accuracy, Reduced Time
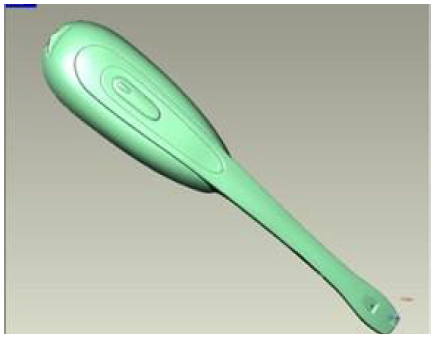
 Laser Design has performed many varied laser scanning projects on electronic devices and accessories. “Over the years we have developed an awareness of what needs to be captured for this type of scan,” Carlberg explained. In one such project, Laser Design was called upon to scan wireless headsets that were known for their audio excellence, comfort and cutting- edge styling. The scan data would be used for first article inspections performed on a continuous stream of first articles. The high quality of the headsets demanded that the suppliers provide parts that conform to the company’s design intent within very tight specification requirements and on an aggressive product introduction schedule. When it receives first articles that are not acceptable, the company must provide clear guidance on what is wrong so the tooling can quickly be corrected.
The sophisticated acoustics of the headsets and their new stylish designs with complex geometric components are injection molded, a precision manufacturing process that requires costly and time-consuming tooling. Headsets often have many components with very intricate geometry that must fit together perfectly at the assembly stage.
 In the past, first article inspection was a very difficult and labor intensive process. First of all, the previous method was an incomplete inspection of the part. The limited set of datum points measured by contact measurement methods could be within tolerances on the first article while other points on the part might be out of tolerance. Of course, increasing the number of datum points increased the probability that they more fully represented the part geometry, but this also significantly increased the time required to perform the inspection, and in the end the data set was still incomplete.
Non-contact 3D laser scanning insures that the entire profile of the object is captured very accurately. Since there is no contact tip on a laser scanner that must physically touch the object, the problems of depressing soft objects, measuring small details, and capturing complex free-form surfaces are eliminated. Carlberg noted, “Non-contact laser scanning is changing the manner in which first article inspection is done. We can now compare the entire part with the color-coded error reports, insuring in-spec dimensions everywhere.”
Maintaining the geometric integrity of all components is also critical to successful, time-to-market delivery of the company’s cutting-edge styling. The inspection and its speed at this stage are critical. Laser scanners collect hundreds of thousands of datum points per second, so a complete scan of a headset would average only a few minutes to perform.
“We have substantially improved the accuracy of and reduced the time required for first article inspection by using laser scanning to inspect each first article,” said a mechanical inspector for the company. “Laser scanning generates a highly accurate surface model that can be overlaid on the solid model of the part geometry to quickly identify any variance from the design intent.”
Advantages at a Glance: Speed, Precision, Completeness
Capturing the free-form shapes and irregular surfaces of consumer electronic products is a prime application for non-contact laser scanning. The process is extremely fast and accurate, which drastically reduces time to market. Customers are continually amazed by the amount of fine detail shown in the scan files. The complex profile data is complete because the whole surface is scanned, not just reference locations.
With the ever increasing speed of the innovations in the cell phone, wireless, and electronics markets, only a super speedy measurement method could keep up with the constant changes required at the lightning-fast pace. Laser scanning is the solution to producing quality electronic device parts quickly, accurately, completely, and confidently.
