Artec 3D users have long known of the power that handheld 3D scanners provide: fast, accurate, flexible, and easy to use, all contained within a handheld device an operator uses with controlled motion, rhythm, and mechanics. A dance of art and science. Data processing on the other hand still requires essentially a human being, sitting (or standing) at a computer, clicking away on a mouse and tapping away at a keyboard. Compared to scanning, data processing feels kind of boring.
Optimizing and then mastering data processing takes time and experience, and learning when a project requires full control and when you can let the software “take the wheel” is an important skill to learn in order to use your abilities economically. Automation and batch processing can benefit in large ways such as when you can set something and forget it, walk away, and return later to a finished processing step. It can also benefit you in small ways where you can process a small amount of data while multitasking on a more important duty. Whether you’re new to the world of 3D scanning or have successfully created multiple models, there is at least some value to be gained from learning when to let go of the reins for just a moment. Here are 5 methods Artec 3D technologies support automation, batch processing, and other forms of A.I. assistance.
- Autopilot
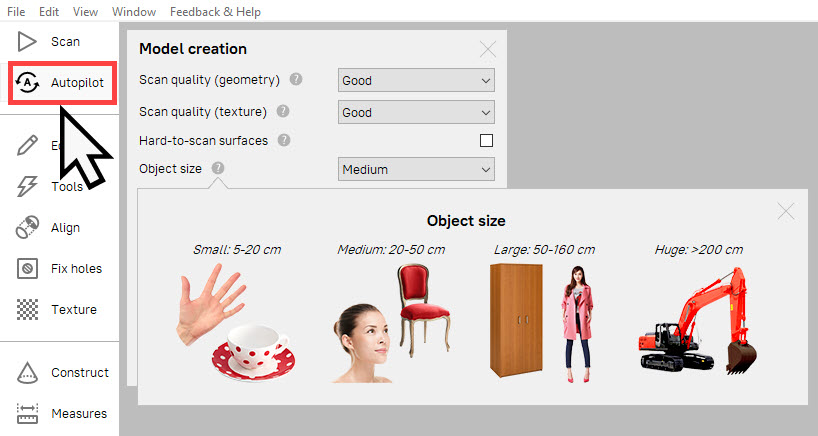
In the world of cell phones, Apple iPhones are valued for their “walled garden” approach to software, meaning the amount of customizability would be limited in lieu of an overall greater average user experience, with the developers seeking to avoid undesirable outcomes proactively for the user. In the world of 3D scanning, a walled garden approach is a recipe for disaster, as the toughest 3D scanning challenges often require creative solutions that push the limitations of what the software was built to do. Not every project is a tough challenge requiring your full, undivided attention, so Artec has designed a convenient Autopilot feature that borrows the walled garden design philosophy and gives the user the ability to choose.
The Autopilot will automatically choose the proper settings and sequentially run the entire core processing workflow: alignment of data, global registration, outliers removal, fusion, mesh simplification, and texturizing. The user simply enters a few key attributes of the project, such as part size and geometric complexity, and then the software takes care of the rest! Only erasing unnecessary data is left without a role in the autopilot, but the user is prompted when it is appropriate to do so. A human operator will always have the potential for better results than the autopilot, however the autopilot definitely earns its spot as number one on this list.
- Artec Cloud
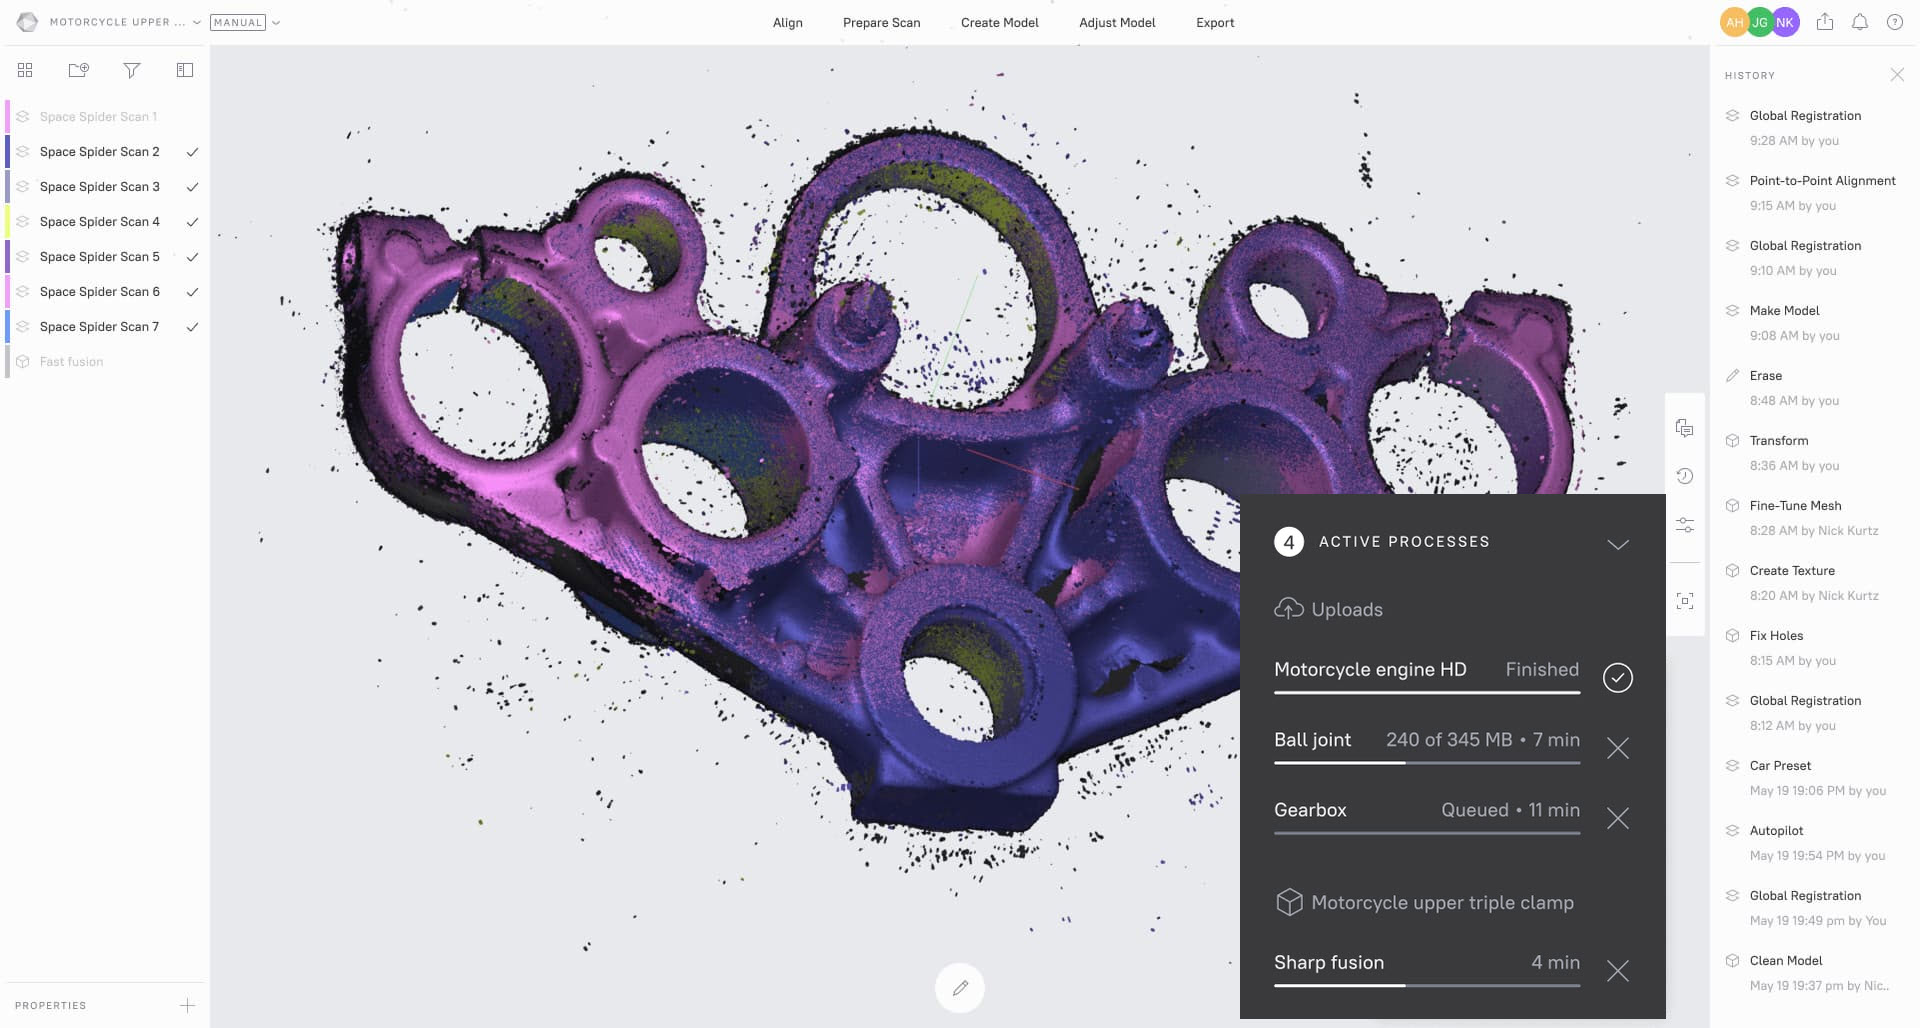
A new software option in 2021, Artec Cloud is the ideal solution for users who want to manage their projects online, and also power through multiple projects simultaneously. The status quo for 3D scan data processing is the user is limited by the computer resources they have available. If the only PC available has lousy specs, the overall performance of the 3D scanning technology will be limited. The key benefit of Artec Cloud is users can rely on cloud servers for the heavy lifting of data processing, meaning they only need an internet connection to process their data, and this dramatically lowers the floor of acceptable computer hardware for 3D scanning.
Another key benefit is the ability to process multiple projects at once. Since the software is a service model and is centered around the data usage and storage, you can process as many projects as you want simultaneously! The age-old problem of when to process scan data on work-trips is a thing of the past: upload your data to the cloud and maybe even recruit help from coworkers at home to speed up the time-to-completion for on-site projects. Users can even collaborate within the Cloud interface to leave comments and give and receive feedback on the work, accessible from any other computer! Artec Cloud is an exciting addition to Artec 3D’s repertoire of solutions, and users who need results faster ought to look at Artec Cloud as a solution.
- Global Registration’s “Registration mode”
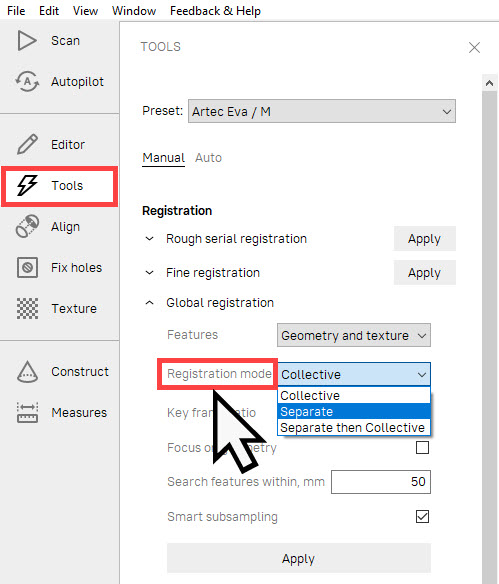
Artec users for more than a few years have long known the tedium of manually selecting one-at-a-time their individual scans to run Global Registration. The idea being: aligning 3D data is “consensus building” in 3D space. If global registration is run on each scan individually, it means the scan data, once aligned, will inherently have an extremely tight fit and will likely not contain any significant misalignments. The idiom of “measure twice, cut once” applies here, as time itself is the sacrificial input you want to be careful with, and running global registration first on individual scans, and then again on all the scans together, ensures that things work out properly the first time.
Registration mode set to “collective” is the classic registration experience: all selected scans basically get thrown into a bucket where a bunch of complex math fits data together very carefully. This applies to all selected scans: top, bottom, sides, etc. When the mode is set to “separate”, this will consider separate scans such as top, bottom, sides, etc. as separate entities, and global registration will only be run on each scan individually. This completely eliminates the tedium of manually selecting scans individually. If your project contains 10 individual scans, you no longer have to show/hide/run global registration 10 times; you now only need to select all 10 scans and run global registration in separate mode, and all work is done with a single button click! Setting the registration mode to “Separate, then Collective” is an extremely time saving final option to consider. As the mode name suggests, a single button click will run separate registrations on each scan, and then a final collective registration is run afterwards. This is an extremely powerful approach in processing large projects where there is a risk due to some complexity or repetitiveness of features that would risk a registration error if not handled appropriately.
- Tools Mode: Auto
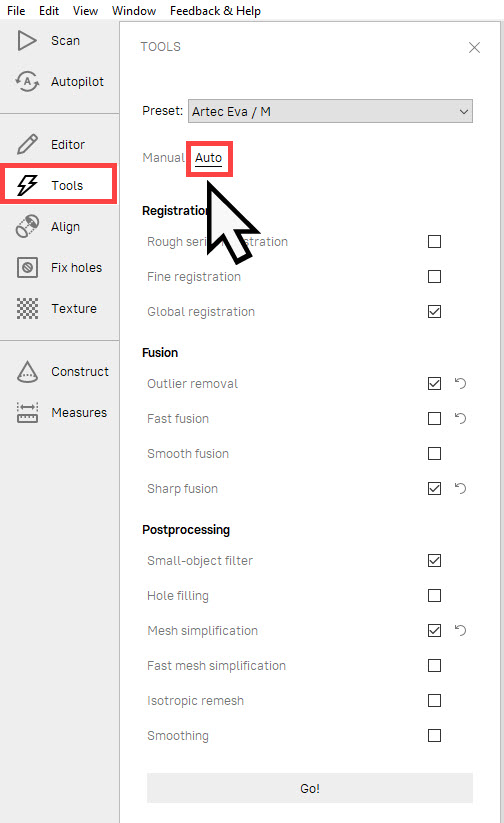
This is an oldie. Well, it’s an oldie where I come from. The default interface in the Tools ribbon shows a vertical stack of buttons such as Global Registration, Outliers Removal, etc. The default mode is set to “Manual” which can be seen at the top of the Tools ribbon interface. Clicking on “Auto” will change the interface to show a vertical stack of checkboxes instead. Simply check the boxes of the algorithms you want to run, press the “Go!” button, and the software will run your selection in sequential order, top-to-bottom. This is an extremely simple yet effective method of processing large numbers of the same kind of objects that require the same settings.
- Auto Alignment
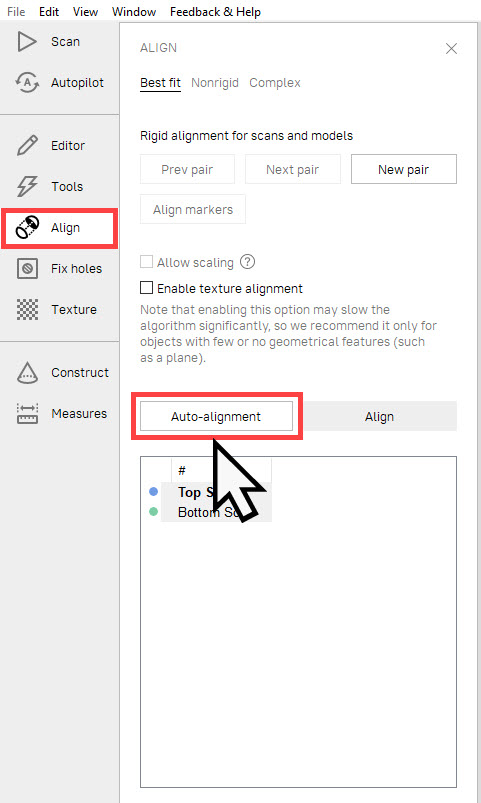
Have you ever scanned a large object that requires a dozen or more individual scans to complete, and have you ever thought during the Align step, “Can’t someone else do it?” Enter the Auto Alignment feature. Available as a simple button press within the Align tab, the software will make an accurate but not foolproof guess at what the pieces ought to fully assemble into. This is the most “Batman” of the entries on this list as it can magically turn a jumbled mess of pieces into a completely assembled scan in only a few seconds sometimes. While this tool will not reassemble a shattered vase’s pieces back together into it’s whole, the Auto Alignment button is a great thing to press if you want to answer a quick email or go get a cup of coffee and return to find the data completely aligned.
- Hole Filling
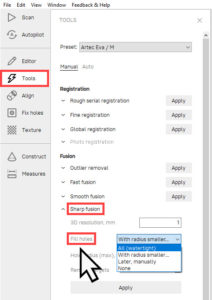
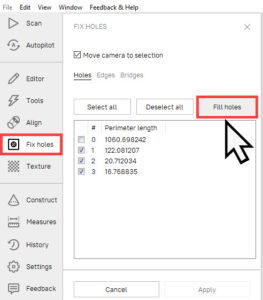
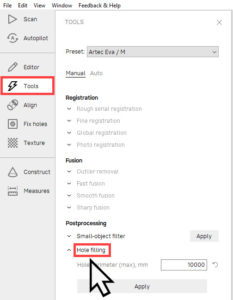
Mass hole filling operations are spread out throughout the software interface. The first primary method is actually in the fusion settings. When using Sharp or Smooth Fusion, you can set the hole filling method to “watertight”. This will fill all holes (if possible), resulting in a complete model ready for export. The second method for batch hole filling is in the Fix Holes tab. This will show you a list of every hole found and their size (perimeter), allowing you to select all, single, or multiple holes to fill at a single time. The final method of batch hole filling is found in the Tools ribbon. The “Hole Filling” button allows you to fill all holes up to the size limit you designate. This fills holes with a smooth curvature, resulting in a much more aesthetically pleasing final shape for most objects.
- Data Selection Options
Finally, is Artec Studio’s automation/assistance in selecting mesh data. Using software assistance in this way is the like a race car driver taking the inside track to shave seconds off their lap time – every little bit helps! Artec gives you data selection assistance in several key ways:
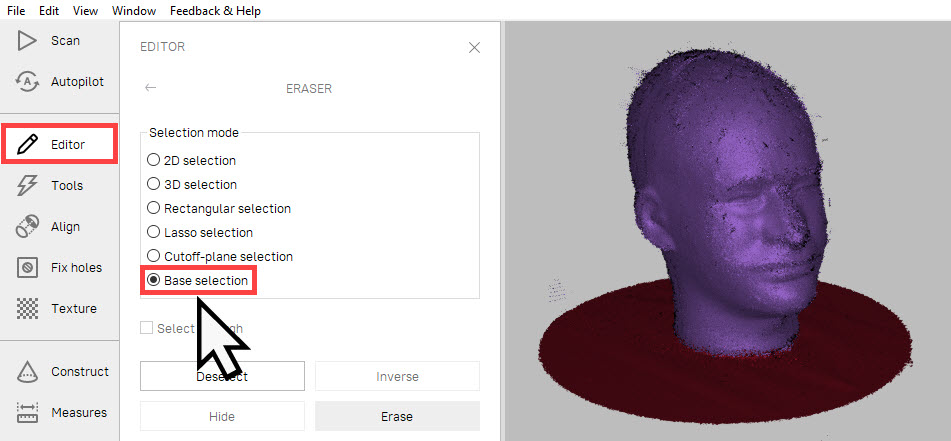
- “Base Selection” using the eraser tool. When scanning objects on a table, the table itself may not always be perfectly flat. When using your eraser tool to delete the table, the “base section” option will use software assistance to expand your initial selection into the entire surface it was sitting on. The software will make small adjustments to any undulation or warping of the surface, giving you a semi-automated way to cleanly delete unnecessary data!
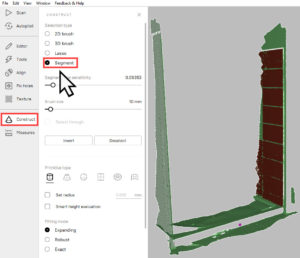
- “Segment” selection type in the Construct tab. Artec Studio allows users to construct primitive CAD features such as cylinders, planes, spheres, etc. that “snap to fit” the scan data, similar to how Microsoft Excel can be used to interpolate tables of data. For example, after scanning a candy cane, a user can construct a cylinder that fits through the main body of the cane, and this lets the user align the candy cane to the world origin, such as the Y axis. The “segment” selection allows a user select only a small area, and the selection will grow to fit the desired region. The key benefit here is the ability to refine your selection in order to construct the CAD feature most appropriately. This saves time and allows users to expend much less time and effort in fitting primitive features.
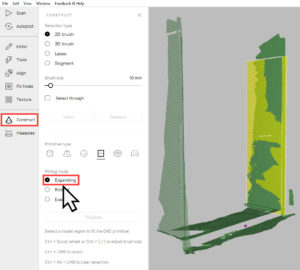
- “Expanding” fitting mode in the Construct tab is the final place for data selection automation. Much like the segment selection type, the Expanding fitting mode will program Artec Studio to expand your initial selection to fit primitives appropriately, but the difference is the immediate result. Expanding fitting mode is the fastest fitting method, meaning it should be used when speed, rather than accuracy, is desired.
Wrapping it Up
Artec Studio’s improvements over the years have added a tremendous amount of software assistance in various areas to help users complete projects faster, with less effort, and helps lower the skill floor necessary to process complex projects. Contact us today to learn more and upgrade to take advantage of these brand new tools and features in Artec Studio 16! View further full details.
