The rise of powerful handheld 3D scanners has dramatically changed the landscape where 3D scanning is able to be performed. No longer must parts be removed from location and shipped or brought to an office for 3D scanning on a stationary machine. The Artec Eva, Space Spider, and Leo handheld scanners represent some of the finest and most flexible portable scanners ever created and learning how to maximize their portability will be essential to mastering these scanners. Three key aspects of portability that deserve special attention are portable scanning accessories, the pitfalls and best practices of cleaning/maintenance, and utilizing the portable nature of the data.
Portable Powerhouse
For all 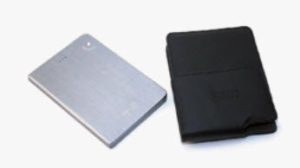 3D scanners, batteries are available. The Eva and Space Spider do not come with a battery but can be purchased separately. These batteries boast up to 6 hours of continuous scanning, however you are rarely scanning continuously. Most 3D scanning projects cycle through periods of scanning, followed by periods of data processing where the scanner is sitting idle. In many cases, a single charge of the battery will last for days if not weeks.
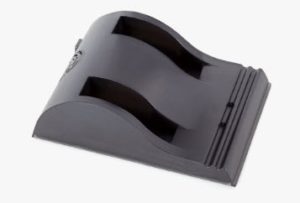 The Leo is different in that it comes with a battery. Additional batteries and a charging cradle are available, however the charging rate on the Leo is much faster than the battery for the Eva and Space Spider. In short, you will be able to fully charge a Leo battery multiple times per day if needed. The Leo battery has a similar 6 hours of continuous scanning, and can last much longer when sitting idle in between scanning. Charging the Leo is done by plugging it into a standard wall outlet. Generally speaking, the Leo charges about 1% every 1-minute plugged in.
To protect your scanner during traveling, you will want a case. Fortunately, the Artec Space Spider and Leo come with their own heavy duty case with foam cutouts at no extra cost! This means the Eva is left out, only coming with a rugged cardboard shipping box. The cases are sold separately, but you can purchase your own heavy duty case for the Eva.
Another special accessory worth considering is a portable field monitor for the Artec Eva. The Artec Eva requires a USB connection to a laptop to work, so it usually makes sense to use the laptop display to track your progress. In some cases, you may wish to use a battery powered portable field monitor and attach it underneath the Eva. You can then connect the monitor to your laptop via a HDMI cable. If you use a long enough cable, and pair it with an “Active” USB extension cable, you can use your Eva scanner with a battery powered monitor attached underneath duplicating your PC display. It’s a very effective way of transforming your Eva scanning into a Leo-like scanner!
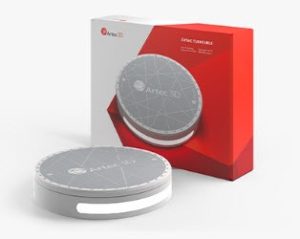 To make your life easier when scanning in the field, you will want to bring accessories such as 3D scan spray, tape, markers, etc. A special accessory worth considering is the Artec Turntable. Primarily only used for parts smaller than a shoebox, the Artec Turntable offers a unique way to 3D scan where the turntable automatically moves with you and responds to your scanning. Scanning in the field can mean being forced to work in non-optimal conditions, cramped spaces, etc. so a turntable like this can make a huge difference.
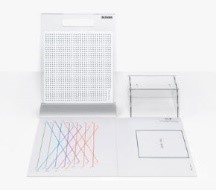 When it comes to calibration, the Artec Space Spider is the scanner that comes with a calibration kit. When scanning in the field, you may accidently bump the scanner into a hard surface. Doing so may throw the scanner out of calibration. The Artec Space Spider calibration kit can be disassembled to fit in the Artec Space Spider case and can easily be assembled and ready to use in under 5 minutes. Recalibrating the 3D scanner in the field is the ultimate bush fix.
Maintaining and Cleaning
Using a handheld scanner outside of a clean office means it is subjected to the accumulation of dirt, grease, and other impurities, both inside and out. The exterior of the scanner can get quite dirty without impacting the performance of the scanner (as long as the lenses aren’t obscured), however you will want to maintain the aesthetic condition for a variety of reasons. Please follow these cleaning guidelines:
- Unplug the scanner before cleaning
- The scanner isn’t waterproof. Never get liquid inside the scanner.
- Do not spray water or cleaning liquid directly on the scanner.
- Spray a cloth with a small amount of liquid so it does not drip in the openings and vents.
- Never use acetone-based cleaners such as nail polish remover or Goof Off.
- Never use petroleum-based cleaner such as Goo Gone.
Cleaning the interior of the scanner is usually only ever done through a can of compressed air. If you routinely scan in a poorly ventilated area, you may find that using 3D scan spray can cause a buildup of spray inside both the scanner as well as the PC and other electronics you are using (not to mention your lungs). In addition to using a mask when spraying 3D scan spray, be sure to periodically spray compressed air into the vents and ports of the scanner and computer to clean out any loose particles.
Working from Home?
When scanning in the field, you may sometimes need to transfer the data to someone else to process, or you might need to take the data home to process. Many other 3D scanners out there will export a single proprietary file type which are easy to transfer. For example, Geomagic will export .wrp files which are usually very large.
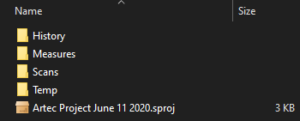 Artec Studio raw data is a bit different. When you save your project, you will end up creating an entire folder worth of raw data, complete with subfolders and a carrier file with the .sproj extension. You should notice the .sproj file is only about 3 kb in size, so it indicates the .sproj alone isn’t the raw data. The entire folder is! You can click through to see large files contained within the Scans Folder to make sure the project has data at all.
To bring the data home to work on, the easiest way is to simply drag and drop the entire Artec project folder onto a USB memory drive. You will not need to do anything special before or after transferring the raw data via USB. If you load the data on any other PC that has Artec Studio installed, you will pick up in the project right where you left off.
 To send Raw Data over the internet through the download link, you will probably want to right click the entire project folder and Send To > Compressed (zipped) folder. This will compress the entire project into a single .zip file which can easily be uploaded to DropBox or some other file transfer system.
By the time your project is complete, the scanner is cleaned, and the battery charged, you will be ready for the next project.
