 Many industries are now benefitting from the increased speed of 3D laser scanning to significantly reduce the time required for product development,functional analysis, and inspection of their products.
Schneider Electric, a global manufacturer of high-precision plastic molded parts, has significantly sped up and improved the quality inspection process in several of their international manufacturing facilities while saving several million dollars a year with the portable Laser Design SURVEYOR FA Series scanning system; overall the company has experienced near 40% reduction in new product verification time and over 70% reduction in determination of rootause analysis on existing product. When using scan data for analyzing functional requirements, inspection time may even be reduced by 90%.
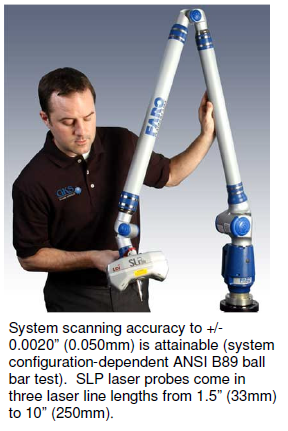
The portable 3D scanning inspection system is based on the FaroArm and the Laser Design SLP laser line scanning probe. It is used on the manufacturing floor to verify plastic injection mold tooling prior to production runs and to first-article inspect highly detailed, plastic injected electrical power transmission components for circuit breakers in residential and commercial / industrial markets. The system can quickly and easily be moved from line to line,building to building or city to city, wherever it is needed, keeping manufacturing lines in service and on schedule.
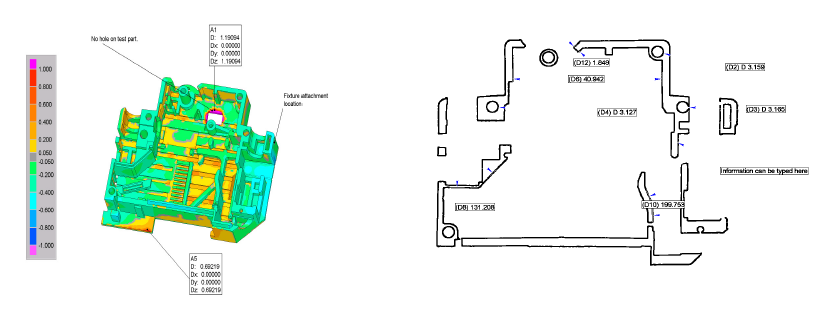
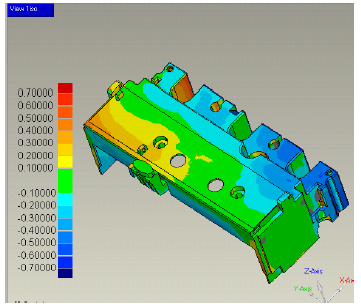
Taking inspection to the factory floor is a recent innovation, made possible by the straightforward setup and operation of portable laser scanning devices combined with a portable scanning arm. The laser scanning process creates a color error map comparing the scan of the part to its CAD model with as many dimensional feature measurements as desired with a report that is run automatically and reported in real time.
 This setup eliminates the time required to send physical samples back for inspection which can seriously impact the release date of a part. Finding deviations and repeating the measure/send/correct/resample cycle can be accomplished on the spot, and corrections to tooling can be made immediately. Getting it right the first time by shortening the development and inspection cycles results in faster time to market and hence more profitable days once the product is ready for sale.
Along with the host of inspection applications, Schneider Electric has found that the Surveyor FA system’s versatility lends itself to many other applications as well. As always, one of the main advantages of 3D laser scanningin the product development process is that it significantly decreases time to market.
In developing a product, a designer may have several prototypes reflecting different approaches to fulfilling the functional design intent. Scanning each can quickly determine which of these designs is an accurate depiction of the design intent. The scan data is used to conduct a form analysis between the original CAD model and the prototypes. This allows the designer to see whether the key functional features meet the design’s needs without taking any linear measurements or having to generate a complete inspection report which takes valuable time. If the critical geometry is not correct in a model then there is no need to waste time measuring the rest of the part.
In addition, if legacy parts are to be recreated or updated and no CAD model exists, laser scanning makes quick and easy work of reverse engineering the undocumented part into a current 3D CAD model suitable for CAD/CAM manufacturing technology..
Once the geometry is verified and the initial tooling fabricated from the 3D CAD model, various materials are usually considered to meet the required performance characteristics. Using the same form analysis method with the scan data, deviations caused by process issues or material characteristics can very easily and quickly be found.
 The form analysis step also presents a great opportunity to “fine tune” the fabrication process to eliminate these deviations in Schneider’s plastic molded parts. The key element is not that a particular feature is dimensionally incorrect, but rather where the deviation occurs. Can changes to the molding/fabrication process be madeto correct the problems? For example, the heating or cooling cycle could be altered or the gating could be changed. Perhaps the cycle time is causing the deflection, or maybe there are differences in shrink rate or cavity-fill rates. Sharing the 3D results with the manufacturing department can reduce the number of trials, and changes can be made right on the factory floor.
When performing a functional analysis, parts generally pass or fail an inspection based on an evaluation of all the dimensions required to fabricate the part. Usually this is an unnecessarily stringent inspection standard; most parts have only a few dimensions and features that determine whether it will function as it was intended to or not.
Because the inspection process has used only linear measurements in the past, many parts failed and were rejected even though they would have performed quite well. 3D laser scanning can help resolve this dilemma by using functional datum or feature alignment. Defining a datum at the location of contact between mating parts or at the axis of a rotation center and measuring from that functional feature allows for a more meaningful evaluation of how a part will perform when in a relationship with other parts.
Surprisingly, very few of these key locations actually control how a part either fits or functions. If these crucial dimensions are not correct, the rest of the part need not be inspected because it will not function as designed. For example, if a part has 100 dimensions, but only 10 are functionally critical, inspection time can be reduced by 90% with minimal risk of having a bad part.
In the process of creating a new part from an old one, many elements can change: fabrication methods, material improvements, suppliers, or just the natural changes that occur over the life of a tool. Perhaps a certain part was acceptable and has functioned in the past. However, when updating the part’s design or refurbishing its tooling, a manufacturer must know quickly whether the new version of the part will function as well as the old.
3D laser scanning is the go-to tool for drastically reducing time to market when determining acceptability of a new part. The new part is scanned and compared to the stored scan data of the original part by superimposing it over the old model to look for changes and out of spec measurements or features in critical areas. The scan and comparison process takes less than 10 minutes, and all the measurements are three-dimensional rather than linear, leading to more accurate and faster quality decisions.
The increased speed, accuracy, and ease of performing 3D scanning with the portable SURVEYOR FA systemsignificantly reduce the time required for product development, functional analysis and inspection, as well as reverse engineering, updating, and refurbishing the tooling of manufactured products. Contact Laser Design today to get your free personalized ROI analysis. See if a SURVEYOR FA high-accuracy high-speed system can facilitate improvements in your manufacturing processes today.
