Project
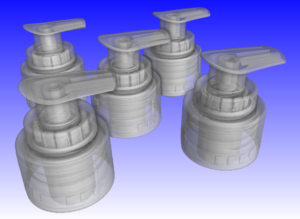
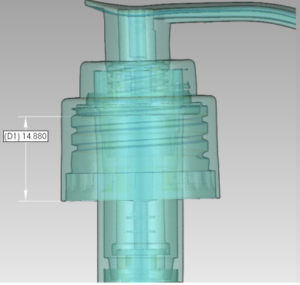
During the earlier stages of new product development, it’s critical for engineers to analyze key dimensions that could cause some failures down the road. For this project, Laser Design, a CyberOptics Corporation brand, was tasked with inspecting a key internal dimension for 50 of the same lotion pump assemblies. The main objective was to analyze this critical dimension without disassembling or destroying the part. The importance of this dimension is that it determines if the pump assembly will maintain a proper fit with the bottle once it is threaded on. Referring to the cross-section image of the lotion pump assembly below, the key dimension was taken from the inside groove of the actuator to the bottom surface of the closure. After consulting with the customer, Laser Design determined that capturing 3D measurement of external and internal surfaces of these assemblies using the RX Solutions, EasyTom Computed Tomography (CT) Scanner would provide the best solution for this project.

Challenges
When it comes to high quantity, repetitive CT scanning, some of the most unique challenges and time-consuming processes are learning how to fixture the parts within the system to achieve accurate 3D data in an efficient timeframe. With CT scanning 50 assemblies, it is important that each of the 3D scans are consistent, so the results are reliable, the processing and analysis are conducted efficiently and a reduction in overall costs can be realized.
The goal was to scan the pump assemblies in batches of 5 and ensure the parts were held in a way that gravity is pulling down the closure in the assembled state. Without this positioning of the pump assembly, a small gap could present itself between the closure and actuator. Here at Laser Design, we have the tools and resources to build any unique fixturing for single part 3D scans and multi-part 3D scans to achieve the best results in the least amount of time. The fixture for this project was built out of foam with small holes of a diameter that allowed a friction fit for each assembly when pushed in at the bottom of the tube. This allowed the closure to rest on the actuator without any gaps.

Results
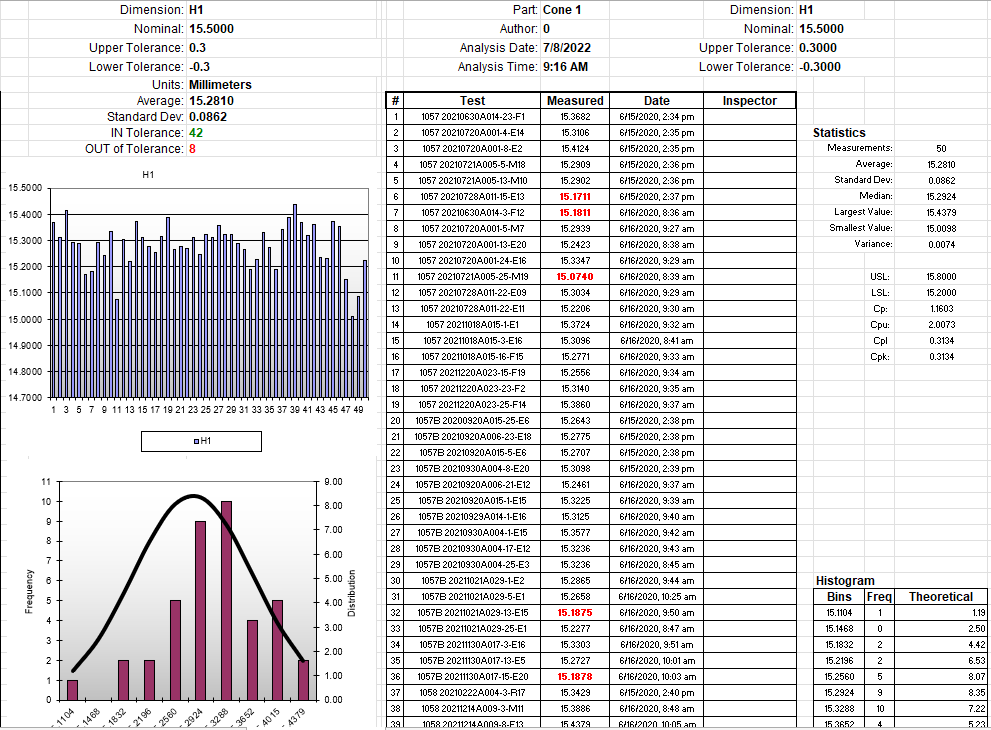
Once the raw 3D CT data was acquired and reconstructed for each of the assemblies, the 3D data was imported into Geomagic Control X metrology software platform for analysis and reporting of the key dimension on each assembly. Utilizing valuable features within the software like automation and trend analysis, Laser Design engineers were able to provide our customer with an in-depth report that includes both visual and tabular results. The automation tools within the analysis platform allowed us to accurately and easily repeat the defined measurements for each part and provide access to these results for further analysis. Plus, any gaps in the assembly could also be seen. The trend analysis report displays statistics such as average, standard deviation, in/out of tolerance, median, largest/small value, CPK and much more as you can see below.

Benefits
With the high-resolution CT scanning capabilities of the EasyTom CT scanner, Laser Design was able to provide our customer with fast and reliable 3D measurement results in an area of their part that they were not able to measure themselves. Even with the most complex and unique 3D inspection applications, we have the resources and experience to find a solution. The data was made available to our customer within days enabling them to streamline their workflow based on the data our 3D scanning services provided.

