By Rus Emerick, Director of Application Engineering, Laser Design
Get a PDF of full application story
Everyone has seen the recent news on 3D printed parts – used in everything from consumer applications, the medical field to the aerospace industry and beyond. In fact, International Data Corporation (IDC) has just released a January 2017 update for its “Worldwide Semiannual 3D Printing Spending Guide.” This new report projects that global spending on 3D printing will undergo a five-year compound annual growth rate (CAGR) of 22.3%, from $13.2 billion in 2016, to up to $28.9 billion in 2020. What types of 3D printing applications will make of most of this spend? Automotive design and rapid prototype printing are meant to generate the most significant revenue, whereas spending for aerospace and defense parts printing will also be very considerable.
The dental 3D printing is expected to rise as is medical implant and device printing, product creation, prototype printing, and prosthetics 3D printing – each generating more than $1 billion in revenues. Healthcare 3D printing applications in general are expected to become much more significant by 2020, with revenues of more than $3.1 billion. With a much wider variety of 3D printers and materials now available in the market along with the decrease in 3D printing prices, new use cases for 3D printed parts pop up every day.
According to Carla La Croce, an IDC research analyst, “The 3D revolution is discovering new market niches, and new uses will arise in the future. IDC identifies the healthcare sector as one with the highest growth potential.”
 One material use in 3D printing that has kept pace with the booming industry is metal 3D printed parts. Along with this explosion comes the question of quality and verification of structure. It is imperative that as we look to keep pace, we also review what this means in terms of the 3 Fs: Form, Fit and Function.
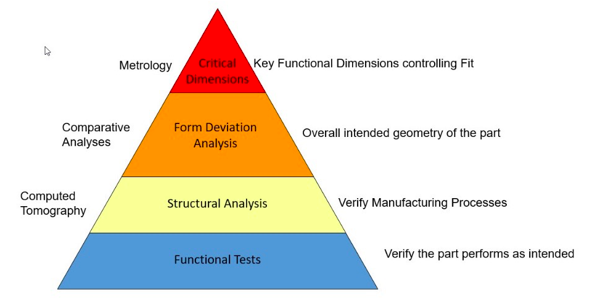
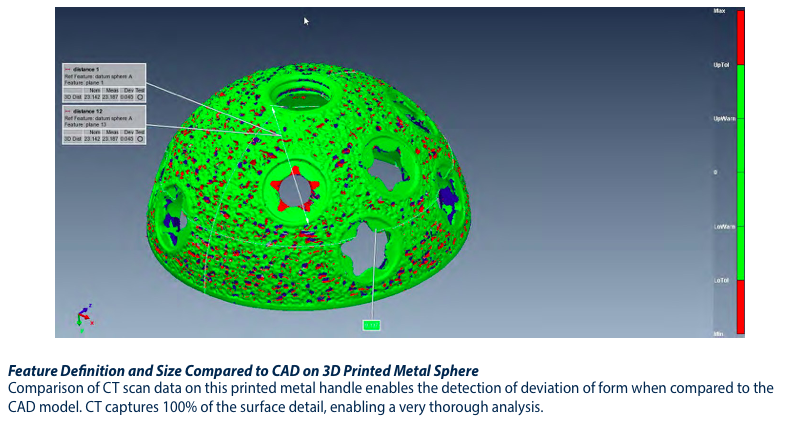
Computer Topography (CT) analysis of these metal 3D printed parts is going to be a major focus for these various industries expected to see a huge growth in use and market potential. A compact CT scanner with ultra 3D accuracy and resolution is a great solution for verifying the structure of 3D printed metal parts. By doing just one CT scan each line of business can determine different functions – engineering, manufacturing and production are able to extract their own piece of the triangle out of single scan and do it independently of one another – finding the right size, shape and fit. By using a CT scanner such as Laser Design’s Compact DeskTom CT scanner, parts fabricated from materials such as thermoset and thermoplastics, ceramics or composite materials, as well as magnesium, aluminum and steel can be measured and efficiently evaluated. Internal structures and assemblies as well as fiber analysis and porosity can be easily visualized, analyzed and documented – saving time and money.
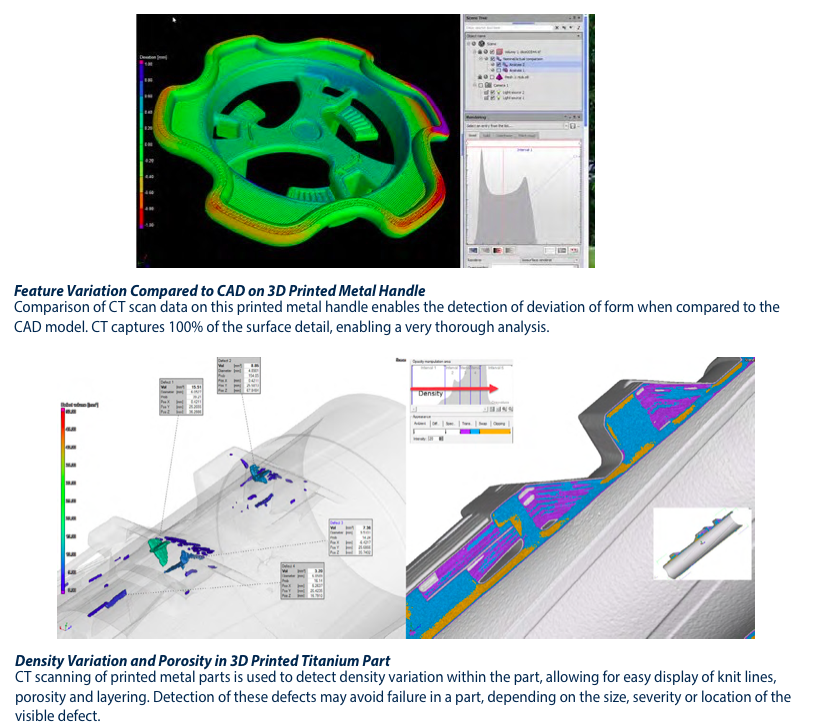
The printing of 3D metal parts is incredibly difficult. For example the slightest impurity in powered metal can be scanned and used, hit with a laser and popped creating a void inside that material that the next layer can easily cover up. If that void becomes denser and/or is in areas of high stress, the part can break and not support the intended weight. This is not yet a consistent or repeatable process yet and the only way to eliminate errors is with computer topography. More importantly, CT is able to do this without destroying the part being printed.
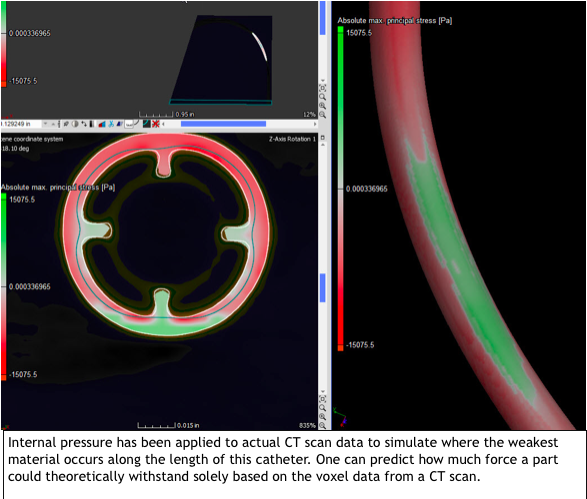
Stress calculation on catheter using actual CT voxel data


There is a huge potential for metal 3D printed parts, but each situation must be analyzed and looked at holistically in terms of fit, form and function. By looking at the cost of quality to invest in and the part required while at the same time determining the risk mitigation or costs of a failure can all be huge benefits for the ROI in 3D scanning. Organizations are starting to see the benefit of 3D metal printing into product processes especially in applications suited for metals, however the only way to resolve any issues and qualify the process is through a thorough CT scan. The risk mitigation – or value of a failure – is different for every industry and you are able to lower this using CT.
