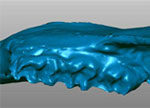
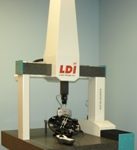
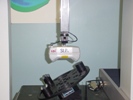
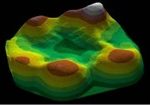
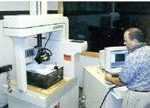
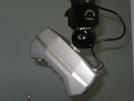
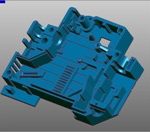
Dentistry’s roots date back to prehistoric times when the practice consisted mainly of tooth drilling and extractions. The science of modern dentistry can be traced back to the 17th century when prosthetics and fillings were added to the original list of treatments. Since its humble beginnings, the field of dentistry has advanced and grown to include preventative, surgical, restorative, and cosmetic areas as well. Today dentists, orthodontists, and oral surgeons need advanced technologies to support their advanced care of the
Accuracy Study on WS-Series System
Executive Summary It is often difficult to describe the accuracy of a 3D Laser Scanning system, because, to date, there is no unified standard that governs it. The typical scanning system from Laser Design is a CMM base with a laser line sensor attached in place of a touch probe. While determining the accuracy of the CMM base is simply a matter of running an ANSI B89 Ball Bar test using a touch probe, no such standard test exists for
CMM Laser Probe Interface
MOTION TRANSPORT RETROFITTING Interfacing an LDI Laser Probe to a Motion System Other Relevant Documents MCSDK.chm which is a motion control driver development guide. CMM or CNC Retrofit Flow, which is a flow chart describing the process of retrofitting a motion transport system with a laser probe. CMM Retrofit Form, which is a questionnaire to be filled out prior to configuring the retrofit kit. General The laser probes collect dimensional data in their own reference frame, and in their own
Anthropology- Primate Teeth
Worn teeth are a bane to paleobiologists interested in the diets of human ancestors and other fossil primates. Although worn teeth dominate fossil assemblages, their shapes are usually not used to reconstruct the diets of extinct species. The problem is that traditional studies of primate dental functional anatomy have focused on unworn morphology. This has limited most functional analyses to only a few well-represented fossil species. This paper introduces a method to characterize and compare worn occlusal morphology in primates
Laser Scanning Improves Reverse Engineering and Inspection Tasks
A wide range of moldmakers are adopting the emerging technology of 3D Laser Scanning in order to improve the accuracy and substantially reduce the time and cost of reverse engineering and inspection tasks. 3D Laser Scanners capture up to 50,000 coordinate points every second, drastically improving reverse engineering and inspection speed and accuracy. Using a laser scanner instead of a touch probe based digitizer or touch probe scanning device mounted on a machining center or CMM (Coordinate Measuring Machine) for
Capture 15,000 Points Per Second By Equipping CMM with Laser Probe
Laser scanners capture thousands of points every second, drastically improving reverse engineering and inspection speed and accuracy. As a result, many companies are either replacing their Coordinate Measurement Machines (CMMs) with laser scanners or purchasing laser scanners instead of CMMs as they expand their operations. But other companies are looking at the large investments they have made in their existing CMMs and asking if they can be preserved or enhanced by equipping them with a laser probe. The answer is
New Advances in 3D Laser Scanning Technologies From Laser Design
At Laser Design, laser scanning technology has been adapted for a variety of high-tech solutions to common challenges faced by manufacturing companies around the world. Laser Design, Inc (LDI) manufactures laser triangulation sensors and complete scanning machines used for measuring parts. LDI also creates the software that controls the motion of both the lasers and the machines, and collects and edits the scan data. Founded in 1987, the company has transitioned from an almost exclusively R & D operation to

