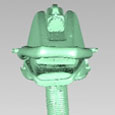
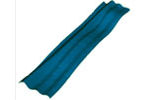
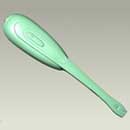
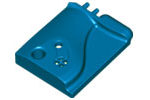
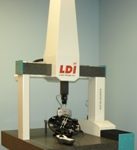
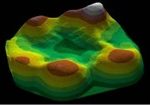
Laser Design’s veteran metrologists have performed many unusual scans in their careers. Some that have come to the fore in the recent years range from small objects and parts like molded plastic parts to ice cream bars to size 23 basketball sneakers to really big projects including huge oil drilling platforms in the ocean and an entire prison compound, decommissioned of course… We have a fun booklet of these wacky stories you can download – simply fill out the form
Scanning a “Bot” from Mystery Science Theater 3000
Company: Mystery Science Theater 3000, an award – winning television comedy, created many unique puppet characters in the course of its 20 – year existence. The show quickly became a cult classic and is still popular today with a large devoted fanbase. Challenge: Producers wanted to create a collector’s item of one of the show’s robot characters. The “real” robot puppet was over 6 feet tall, so a life – sized replica was impractical and too expensive to make. They
Separating the FACT from Fiction: Common Misconceptions about 3D Scanning
Fact or fiction? Data acquired with 3D scanning is inferior to that acquired via touch probe and CMM — This is FICTION! The fact is that 3D scanning captures tens of thousands of points per second, an enormous amount of data that makes the process statistically superior. What other misconceptions about 3D scanning have you heard (and maybe believed)? Read on to separate the FACT from the fiction! Fiction: 3D scanning is expensive. FACT: The cost of 3D scanning has
3D Scanning Helps Kimberly-Clark Save $500,000
Challenge Determine if a capital investment in larger diameter embossing modules is needed instead of the current embosser. Embossing serves several purposes on the surface and within absorbent pads of disposable hygiene products. On the surface, embossing can introduce an aesthetically pleasing pattern onto the pad, e.g. appearing soft, which can also affect fit and comfort attributes. It also has a functional purpose of controlling and directing surface flows. The embossing process is evaluated by the resulting embossing quality, which
3D Laser Scanning Ensures Accuracy and Safety of Free-form Turbine Blades
Turbine blades, made of curved vanes on a central rotating spindle, are everywhere. They whirl in everything from jet engines to wind-and water-power generators. They are even part of refrigeration processes and new tidal facilities that produce electricity. However, turbine blades of all sizes present a difficult challenge to their manufacturers: accurately producing and maintaining their complex free-form surfaces and convoluted shapes. To begin with, manufacturers of turbine blades want to know whether their as-built parts match the original design
3D Scanning at Laser-Light Speed
Advantages at a Glance: Speed, Precision, Completeness In the competitive speed-driven manufacturing environment of today’s consumer electronic device market, extreme speed and accuracy are mandatory. However, the complexity of shapes and details on the devices create a major speed bump on the road to rapid CAD models. 3D laser scanning overcomes these challenges with its ultra-fast non-contact collection capability; a laser scanning system can gather many thousands of points per second with phenomenal accuracy and detail. The laser digitizes exactly
As Featured in Time Compression Magazine: Reverse Engineering Things to Know
What do you do if you have a die or mold that was made long ago and you don’t have any computer-aided design (CAD) data for it? What do you do if you have a model that was crafted by a sculptor and you’d like to use it for a product? Well, in cases like these and others like them, what you could do is perform reverse engineering, a process that can rather quickly provide you with a CAD model
Compare the Difference: Laser Design Scan Data vs. Industry Average
“We at Laser Design know that laser scanning technologies have advanced tremendously in the last several years,” said Larry Carlberg, Laser Design Service Bureau Manager. “Manufacturers who have adopted them now have many choices to make when they want to digitize their parts: what accuracies are necessary for the application, how quickly they need the data, and what format the scan files are. And they have to decide whether they can accomplish optimal scanning results themselves or if they need expert
Foundry in Fine Form after 3D Laser Verification from Laser Design
Company The well established foundry and pattern shop makes cast parts, mainly aluminum and magnesium, for the aerospace industry. Challenge The foundry had been making castings for an aerospace company for many years. In the normal lifecycle of foundry tooling, parts need to be refurbished to make sure the castings remain within the acceptable quality standards of the customer company. Equipment must be replaced or updated. After the refurbishing process, the new cast parts also have to be requalified to
Laser Design Global Services Advances Life-Enhancing Product for Partial Finger Amputees
The Company Didrick Medical, Inc. is a small privately owned company that designs and fabricates active-function artificial finger prostheses, called the X-Finger®, for partial finger amputees. The owner refined the design for over 6 years before he took it to the marketplace. The device is body-powered, light-weight, and allows users to regain complete control of the flexion and extension movements of an artificial finger in a self-contained device. Each X-Finger® is custom fabricated to accommodate a variety of finger amputation
Just what the Doctor Ordered: Innovative Medical Applications of Non-Contact 3D Scanning
When you think of “Medicine” what comes to mind? An emergency room full of accident victims? A researcher curing diseases in the developing world? Or just getting rid of your own annoying low-back pain? What you probably don’t think of are high-precision non-contact scanning technologies. However, no matter what your perspective or problem, 3D laser scanning may have had a role in improving some medical process you are familiar with and adding to our overall knowledge of and care for
Laser Design’s SURVEYOR FA System Portable High-Accuracy 3D Laser Scanning
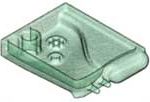
Many industries are now benefitting from the increased speed of 3D laser scanning to significantly reduce the time required for product development,functional analysis, and inspection of their products. Schneider Electric, a global manufacturer of high-precision plastic molded parts, has significantly sped up and improved the quality inspection process in several of their international manufacturing facilities while saving several million dollars a year with the portable Laser Design SURVEYOR FA Series scanning system; overall the company has experienced near 40% reduction
One Laser Scanner Delivers Multiple Applications
Schneider Electric, a huge multinational corporation, specializes in world-class power and control products, through its excellent brands, Merlin Gerin, Square D, and Telemecanique, that fulfill customers’ requirements in the residential, building, industry, energy, and infrastructure markets. When the specialist in process improvement at Schneider Electric first used Laser Design’s Surveyor DS laser scanning system, he expected to acquire clean, accurate scan data, and his expectations were more than met. What he didn’t expect was being able to use the same
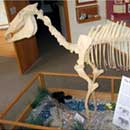
3D Scan of Three million-year-old Horse Skull
The National Park Service’s Hagerman Fossil Beds National Monument in Idaho contains the largest concentration of Hagerman Horse (Equus simplicidens) fossils in North America. It is nationally and internationally significant for its world-class paleontological resources including the world’s richest fossil deposits, in quality, quantity, and diversity, from the late Pliocene epoch. Many of its fossils represent the last vestiges of species that existed before the last Ice Age, the Pleistocene, and the earliest modern flora and fauna. The NPS paleontologists
As-Built vs. Design Intent: A Reverse Engineering Dilemma
Laser Design Inspection Services has been a leading provider of dimensional inspection, 3D laser scanning, terrestrial scanning, and CT scanning services forover 25 years. The company’s metrologists and engineers are experienced in the automotive, defense, electronics, and many other manufacturing industries. One issue that has been common in reverse engineering scanning projects for all industries over the years is making sure that customers know exactly what type of CAD file deliverable they want from Laser Design based on what they will
Long Range Scanning: As Featured in Professional Surveyor
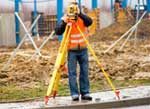
In the early 1990s GPS was a new and amazing, even if a seldom-used technology. Although the military had been using GPS for over a decade, civilian surveyors were skeptical of its necessity when non-electronic hand tools had sufficed since the beginning of their profession.However, it became apparent that the benefits of GPS were such an enormous boon that its use slowly gained acceptance over the years until today it is ubiquitous for all surveying projects. Using GPS to provide
3D Laser Scanning in the Metal Fabricating / Sheet Metal Industry
3D laser scanning offers tremendous time savings and cost benefits for the metal fabricating and sheet metal forming industry. Most importantly, it provides the ability to reverse engineer and inspect complex parts, assemblies and tooling to a higher level of accuracy and in a shorter period of time than with other methods. Instead of collecting points one by one like a coordinate measuring machine (CMM) does, the laser scanner captures tens of thousands of points per second by sensing thereflection
Case Study Portfolio
3M Design Corrected Mid Project The need for safety & protection of people working in facilities is increasing, which prompted 3M’s Occupational Health and Environmental Safety division to develop a new face shield for welders. Well into the design process they were unhappy with the aesthetics of the design and felt the concept to CAD and to rapid prototypes was not working– a major correction to the design was needed in the middle of project execution. A clay model was
3D Laser Scanning Makes an “Impression” on the Dental Profession
Dentistry’s roots date back to prehistoric times when the practice consisted mainly of tooth drilling and extractions. The science of modern dentistry can be traced back to the 17th century when prosthetics and fillings were added to the original list of treatments. Since its humble beginnings, the field of dentistry has advanced and grown to include preventative, surgical, restorative, and cosmetic areas as well. Today dentists, orthodontists, and oral surgeons need advanced technologies to support their advanced care of the
Accuracy Study on WS-Series System
Executive Summary It is often difficult to describe the accuracy of a 3D Laser Scanning system, because, to date, there is no unified standard that governs it. The typical scanning system from Laser Design is a CMM base with a laser line sensor attached in place of a touch probe. While determining the accuracy of the CMM base is simply a matter of running an ANSI B89 Ball Bar test using a touch probe, no such standard test exists for
CMM Laser Probe Interface
MOTION TRANSPORT RETROFITTING Interfacing an LDI Laser Probe to a Motion System Other Relevant Documents MCSDK.chm which is a motion control driver development guide. CMM or CNC Retrofit Flow, which is a flow chart describing the process of retrofitting a motion transport system with a laser probe. CMM Retrofit Form, which is a questionnaire to be filled out prior to configuring the retrofit kit. General The laser probes collect dimensional data in their own reference frame, and in their own
Anthropology- Primate Teeth
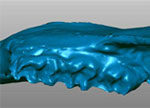
Worn teeth are a bane to paleobiologists interested in the diets of human ancestors and other fossil primates. Although worn teeth dominate fossil assemblages, their shapes are usually not used to reconstruct the diets of extinct species. The problem is that traditional studies of primate dental functional anatomy have focused on unworn morphology. This has limited most functional analyses to only a few well-represented fossil species. This paper introduces a method to characterize and compare worn occlusal morphology in primates
Laser Scanning Improves Reverse Engineering and Inspection Tasks
A wide range of moldmakers are adopting the emerging technology of 3D Laser Scanning in order to improve the accuracy and substantially reduce the time and cost of reverse engineering and inspection tasks. 3D Laser Scanners capture up to 50,000 coordinate points every second, drastically improving reverse engineering and inspection speed and accuracy. Using a laser scanner instead of a touch probe based digitizer or touch probe scanning device mounted on a machining center or CMM (Coordinate Measuring Machine) for
Capture 15,000 Points Per Second By Equipping CMM with Laser Probe
Laser scanners capture thousands of points every second, drastically improving reverse engineering and inspection speed and accuracy. As a result, many companies are either replacing their Coordinate Measurement Machines (CMMs) with laser scanners or purchasing laser scanners instead of CMMs as they expand their operations. But other companies are looking at the large investments they have made in their existing CMMs and asking if they can be preserved or enhanced by equipping them with a laser probe. The answer is
New Advances in 3D Laser Scanning Technologies From Laser Design
At Laser Design, laser scanning technology has been adapted for a variety of high-tech solutions to common challenges faced by manufacturing companies around the world. Laser Design, Inc (LDI) manufactures laser triangulation sensors and complete scanning machines used for measuring parts. LDI also creates the software that controls the motion of both the lasers and the machines, and collects and edits the scan data. Founded in 1987, the company has transitioned from an almost exclusively R & D operation to


