3M Design Corrected Mid Project
 The need for safety & protection of people working in facilities is increasing, which prompted 3M’s Occupational Health and Environmental Safety division to develop a new face shield for welders. Well into the design process they were unhappy with the aesthetics of the design and felt the concept to CAD and to rapid prototypes was not working– a major correction to the design was needed in the middle of project execution.
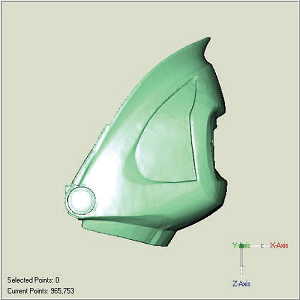
A clay model was quickly made and brought to Laser Design Inspection Services where the left half was scanned. The resulting point cloud was used to guide the creation of the new surfaces in CAD and mirror them to the other side, thus saving scan time and insuring a balanced design. 3M also needed 3D curves created at some of the surface intersections and orientated to an origin at a specified location.
Within 24 hours of contacting Laser Design, the client had the CAD data of the redesigned shield with the key points and features. From there, the designers could finalize the design in 3D CAD which would be used o directly cut the face shield molds.
“We definitely cut our time and costs,” commented 3M. “The traditional trial-and- error method of CAD iterations is expensive. I estimate we saved from $3,000-$5,000 in CAD modeling time by using Laser Design Inspection Services instead.”
Scan Provides Perfect Model for Prosthetic Fingers
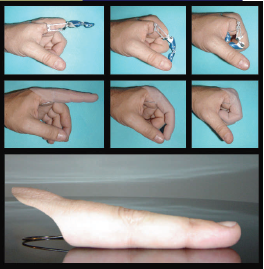
 Didrick Medical, a company that designs and fabricates active-function artificial finger prostheses for partial finger amputees contacted Laser Design Inspection Services about performing scans of two small hand casts for which they were creating prosthetic devices. The devices are body-powered, light-weight, and allow users to regain complete control of the flexion and extension movements of an artificial finger. The owner needed 3D digital CAD model files to create custom prosthetics more cost effectively for a larger market.
The casts each took approximately one hour to scan. Compared to manually measuring, “the process of laser scanning cut 60% off the amount of time to make enough accurate measurements of the casts to create a CAD model,” said the owner. “With over 600 different variations of each finger-hand configuration, plus six different hand sizes, getting the correct measurements is incredibly labor intensive. The speed and accuracy of laser scanning allows me to standardize assemblies and sizes and make all the parts interchangeable. In the future, this will reduce costs, increase availability, and make the process easier and faster for the benefit of the amputees.”
The accuracy of the point data Laser Design provided is .002” or .05 mm of the actual hand cast. To achieve a model of free-form shapes with this kind of accuracy is impossible by any other means. With such an accurate definition of the actual hand, the company can fit a prosthetic device perfectly.
The files were imported as solids into SolidWorks, and the owner was able to do cross-sections and use the side views, which is essential to creating custom prosthetic finger assemblies. Laser Design’ expert metrologists made the 3D scanning process quick, accurate, and cost- effective from start to finish, eliminating completely time-consuming manual measurement. Laser scanning brings the custom fabrication process for prosthetic fingers several steps closer to being an off-the-shelf product.
Correcting the Fit Between To ro ’s Disparate Models
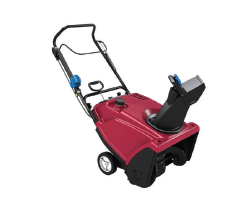
 The Toro Company was in the final phase of developing a new single-stage snow thrower when it ran into an interference problem between two large rotor housing components. One of the parts was made of an injection molded polymer, the other was stamped steel.
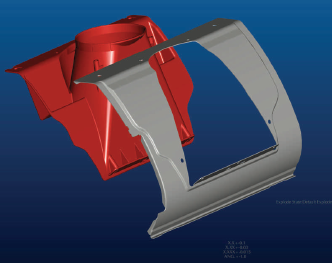
Since both parts were already tooled, Toro needed accurate inspection data that could be compared to existing Pro-E 3D models in order to determine where the interferences were occurring, and how to modify the tooling to get the parts to fit.
Laser Design Inspection Services performed three quick preliminary scans to determine the correct shape and placement of the two parts in relation to each other when they were assembled. This “mock assembly process” aligned the housing to a manufacturing datum, ensuring that the snow thrower auger axis datum was in an acceptable position with respect to the rest of the housing.
With virtual scan data, we can overlay one part’s data with the other’s until they are aligned correctly in the model. After the correct alignment was achieved, Laser Design scanned the rest of the housings, paying close attention to key areas. This technique simulates the physical assembly that occurs during manufacturing. Laser Design then created surfaces from the data, focusing especially on the critical locations.
 The scan data indicated that both parts had significant areas contributing to the interference problem. Toro engineers were then able to download the scan data files directly into Pro-E, and compare the results to the 3D models.
“The process was very successful for us,” concluded the Toro designer. The mating assembly holes in the initial parts were almost one-half diameter off, but by using the scan data, the engineers were able to correct the problem quickly and accurately before the pre-production pilot build, and more importantly, before the production process was online.
Speedy Delivery for Ferrari Racer
The Austin Group was contracted to reconstruct a transmission case made for a rare 1967- 330P4 Ferrari Racer. The original P4 Racers are estimated to be worth $10 million, and a replica can net $200,000. The functioning transmission case consisted of complex shapes that required high levels of accuracy, and the customer wanted the part right away.
Computer-aided design geometry did not exist for the transmission case, so the Austin Group needed to reverse-engineer the component. In the past, the design firm used a digitizer arm to measure the position of individual points as it was moved around a part. The resulting points were imported into modeling software for the designer to stitch together to form a solid model of the component.
Generally, capturing a few thousand points with the digitizer arm would take 70 hours, but many of the points needed to determine the precise geometry of a component often still are missing. The designer is forced to rely upon intuition and guesswork to create a final model. The interpretation process typically takes 50 hours of work, making the total time spent to re-engineer the part 120 hours.
Instead, the Austin Group opted to use laser scanning where far more points are generated, so the solid models are created quicker and with better accuracy.
Laser Design Inspection Services provided the Austin Group with laser scanning and consultative engineering services for both the reverse engineerin g and inspection of the part. In less than a week, Laser Design provided solid models of the component that matched the original physical part at 40% less and twice as fast.
With the geometry of the Ferrari Racer transmission case fully defined, they could proceed with casting it in lost foam. Using the solid model provided by Laser Design, the firm created a foam pattern and gating system, which was coated with refractory and dried under controlled conditions. The coated cluster was invested in a flask with loose, unbonded sand, which then was vibrated for compaction. Molten metal was poured onto the top of the gating system, directing the metal throughout the cluster to replace the foam gating and patterns and create the casting.
