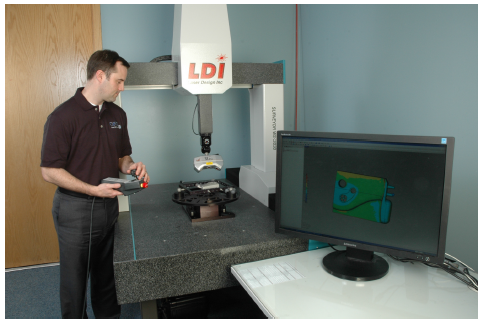
What do you do if you have a die or mold that was made long ago and you don’t have any computer-aided design (CAD) data for it? What do you do if you have a model that was crafted by a sculptor and you’d like to use it for a product?
Well, in cases like these and others like them, what you could do is perform reverse engineering, a process that can rather quickly provide you with a CAD model of the object in question. To learn more about this, we talked with Larry Carlberg, service bureau manager at Laser Design Global Services which is part of Laser Design Inc. Laser Design is a service bureau that performs the scanning services that can be used for reverse engineering (the scanning can also be used for purposes of metrology); Laser Design is a company that produces systems that can be used for laser 3D scanning. (Speaking of scanners and metrologyand credibility: In November 2009, Laser Design announced that the Materials Reliability Div. of the National Institute of Standards and Technology (NIST) had purchased one of its SURVEYOR WS Series systems. It is equipped with a laser line scanning probe, the Laser Design SLP-250, which has 9-micron accuracy. It also uses a Renishaw PH-10 CNC head indexer, and a Wenzel coordinate measuring machine (CMM) base. This system not only performs laser scanning, but also has the capability of using touch-probe technology.)
 Laser scanning for 3D part characterization is not totally unlike the scanning that takes place in the supermarket when the barcodes are read on your groceries. Of course, the grocery scanning is a 2D operation. In the case of reverse engineering, it is, of course, 3D.
Carlberg says that about 25 years ago, industrial or product laser scanning was performed with single points. But now, there is a line probe that spreads the laser diode beam into a line, which is then used to collect points (as a line is a series of points). Some systems are capable of measuring 70,000 points per second on a surface. Carlberg ses the analogy of painting an object with a spray gun, moving it back and forth. But here it is “painting” the surface with light. There are sensors that are slightly offset to the beam such that there is a triangulation effect, thereby providing dimensional locations in space so that the points collected can be plotted.
The points form what is known in the reverse engineering community as a “point cloud.” This point cloud has X, Y, Z coordinate information for the points collected. The point cloud is then trans- formed into a CAD model that can be delivered in native formats including AutoCAD, Solid Works, Pro/E, CATIA, NX, Rhino, Revit, and more.
“Most of the things we measure you can hold in your hand or at least move around.” Carlberg says. However, they also have systems that allow them to perform long-range scanning, such as the inside of a power plant. He explains that in this case, it may be that they want to add some new piping or a building addition. They perform the laser scanning—collecting information from points hundreds of feet away (and consequently not nearly as accurate as the CMM-based systems, which can provide an accuracy on the order of 12 microns)—which creates the cloud, which can then be used for the CAD model of the interior of the building.
But back to parts of a smaller size than a building.
One of the things that reverse engineering permits companies to do is to develop things like accessories for products. For example, consider a cell phone. A company can have the cell phone scanned and the CAD model generated, and then develop accessories that have a precise ft. (One of the things that Carlberg says sometimes happens in production is that the CAD model and the product as-produced are at variance, so even if one was working with the original CAD model, the precise ft might be lacking.)
In addition to laser scanning, there is also CT scanning—yes, the same sort of computerized axial tomography that is common in medical facilities. This, Carlberg says, is useful when there are internal features of an object that need to be modeled. That is, while laser scanning can measure some depth, it is really more about the surface. Carlberg says that if it was a matter of creating a model of something like an intake manifold of a car, in order to get the inside with a laser scanner, the manifold would have to be cut in half and then the two interior surfaces scanned and joined with the other points in the cloud. The CT scan would be capable of getting the inside, as well, so the manifold, for example, wouldn’t have to be cut in half.
Then there are the free-form shapes. Carlberg cites the case of a company that was interested in making shingles that resembled cedar shakes, a surface design that he characterizes as having “an organic shape and very, very irregular. It would take too long to make it worthwhile to draw it in CAD.” But with the laser scanning,it could be done in minutes. The laser scanner allows rapid modeling of parts. The data is used to create a CAD model that can be used for a variety of purposes, from analysis to creating manufacturing programs.
