 Laser Design Inspection Services has been a leading provider of dimensional inspection, 3D laser scanning, terrestrial scanning, and CT scanning services forover 25 years. The company’s metrologists and engineers are experienced in the automotive, defense, electronics, and many other manufacturing industries. One issue that has been common in reverse engineering scanning projects for all industries over the years is making sure that customers know exactly what type of CAD file deliverable they want from Laser Design based on what they will be doing with the data and their budget.
Sometimes customers have a mistaken perception that 3D laser scanning means placing their part in a magic scanning box, pressing a button, and presto, a perfect 360-degree parametric model emerges, ready to be used in any CAD, CAM, CAE, or rapid prototyping application. Not so says Larry Carlberg, Laser Design and Laser Design Sales Manager. “The results of laser scanning run along a continuum of relatively simple to extremely complex model formats. Cost, time, and level of communication required increase along with the complexity of the results desired. At Laser Design we always ask customers what they will be doing with their CAD files, so we can provide them with the correct level of complexity and file format.”
 One of the first questions in reverse engineering applications is always, “do you want the data to reflect the as-built part that is being scanned, or to create a perfect CAD model reflecting the original design intent?” When this question is clearly understood and addressed, then Laser Design can provide optimal results for every customer. Unfortunately, reverse engineering is a process and real parts as manufactured never exactly match the unambiguous design; there are always some variations which can be shown in an inspection report.
Obvious flaws such as damaged, broken, or worn areas on a part need fixing, but other manufacturing defects create grey areas. Does the customer want manufacturing defects such as core shift, sink, shrink, warpage, flash parting line, dam, sprue, gate or injector pin artifacts, corrected? Is mirroring one side of an obviously symmetrical design intent does each side need to be unique to better replicate the current manufactured part? We often scan a complete symmetrical part and try to design with symmetry by averaging in the middle of both sides. However, the final part may end up with significant deviations from the actual scanned part to achieve this symmetry in the CAD model. Are there design modifications that need to be included?
Customers often know what they want to accomplish, but not what type of model they actually need to do so. Some engineers are still used to working with 2D prints or 2D AutoCAD drawings. However, these drawings often contain conflicting information: dimensions that don’t add up, lines that are misplaced or slightly off, undefined blend areas, etc. When a 3D CAD file is created from an actual part, every dimension is modeled from a real physical measurement, so all the information jives. The softwareused in the 3D world is very sophisticated; mistakes with conflicting view information do not occur.
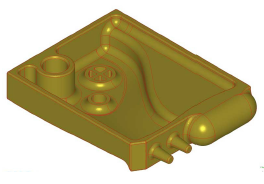
If a customer’s end result wishes have not been made explicit, Laser Design metrologists can sometimes make educated guesses based on experience as to what areas are kept “as-built” and which are corrected to “design intent.” On simple shapes such as flat surfaces and straight edges, this is not difficult to infer (see Figure 2 below). If a cube designed with 6-inch sides has 6.01” sides, then correcting the length to 6” is simple. One can also generally assume that the sides should be parallel and perpendicular to one another.
However, as complexity of the part increases, options for “design intent” also increase exponentially and Laser Design engineers are no longer able to decide what is needed. If a shape is complex, how can the Laser Design metrologist decide what to “true” and what not to? For example, molded parts may have parting lines; parts cast in sand may be out of spec because the sand eroded, or have uneven surfaces from machining done on the finished part. Mounting and mating issues may make some dimensions of the part critical to its fit in an assembly. We simply don’t know without detailed instructions.
“As-Built vs. Design Intent” – What does that mean exactly?
Do you want the scan data to reflect the part exactly as it is built?
Or do you want what the designer intended, meaning a perfect model, without manufacturing flaws and variances?
“What Will the Customer Do with the Model?”
The level of complexity of your model is based what it will eventually be used for. The first decision to make is whether you just need surfaces, or do you also need features and design history?
Low Level: Surface Model. This is the simplest type of model
Uses: To replicate a part or manufacture it as is with no future changes. To use in FEA analyses.
This is a difficult position to adhere to because humans are notorious for changing their minds and for repurposing designs.
However, over 90% of Laser Design customers are able to use this type of model in IGES or STEP format for their applications. This level of complexity is called a surface model. The surfaces are defined to a high accuracy and are easily manufacturable. It can also be used to cut a mold.
Editability: Only simple changes, such as mirroring, scaling up or down, etc. are possible. A customer would do well to carefully consider this option. A fully editable model usually costs 2-3 times more, so if you will never change the current version, it makes sense to use this type of model.
High Level: Solid Models: Parasolid or Native Solid. These types of models are more complex and costlier.
Uses: To make part variations, with features and design history.
This type of model typically costs 2-3 times more than an IGES or STEP surface model but is easily edited. Sometimes this model is called a “parametric” model. It is solid and the designer is able to define the part and create design rules with which to edit the part. The software defines the parameters and how to modify them, creating a history of the design process.
Editability: Design engineers are faced with complex design decisions everyday. This level of complexity can contain design information to make modifications consistently when changes are desired.
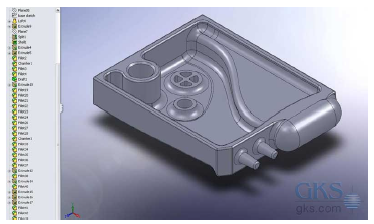
For example if the weight of a part needed to be reduced, several options could be tried: decreasing length of the part, making the walls thinner, making an opening larger, etc. Or if a part with a hole was to be increased in size the engineer could create a design rule that either moved the hole in relation to size of part, or keep hole in same spot regardless of size of part so that it would match an assembly. (See Figure 3.)
The Laser Design Process
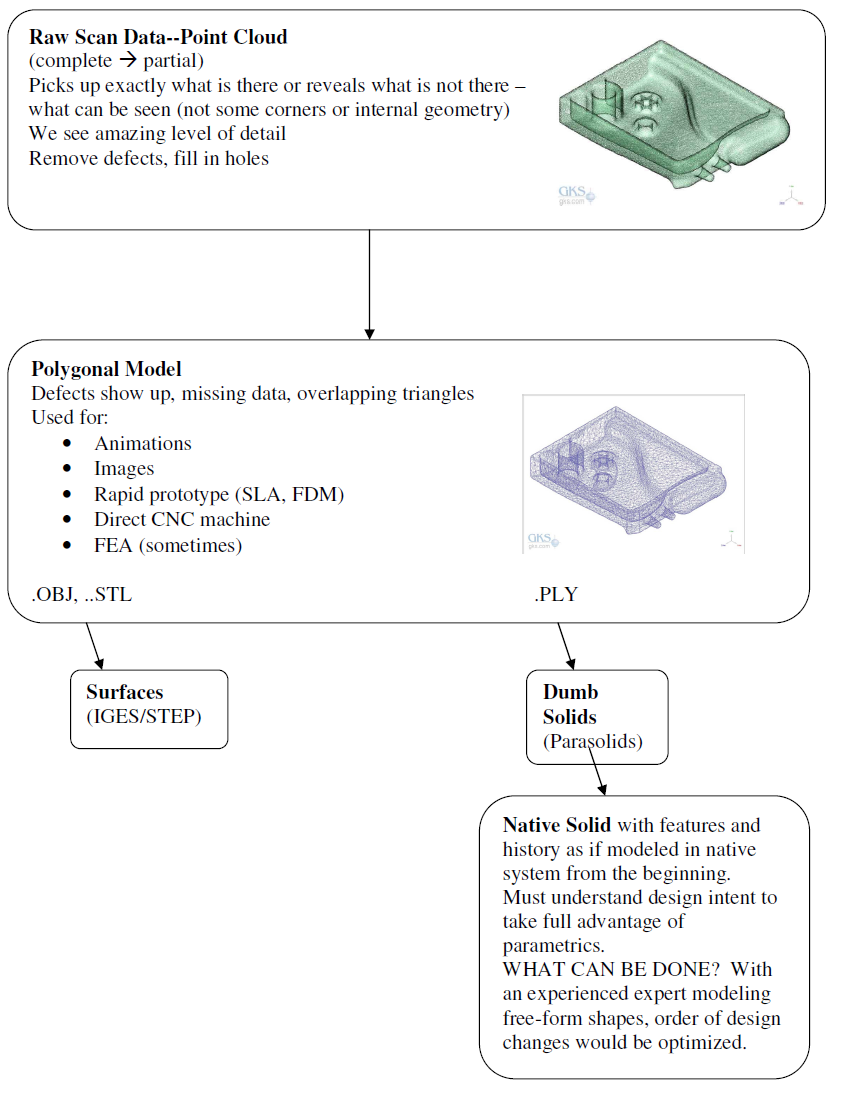
The flow chart below illustrates the Laser Design quote process. As the flow proceeds downward, the amount of information about design intent (required accuracies and density) becomes greater and more complex. The scanning expertise needed from Laser Design engineers also increases. This results in the price increasing and the turnaround time increasing, as well as the editability and complexity of the deliverable scan files.


