A Closer Look
Tag Team Champions
In a previous blog post, we covered the Artec Micro 3D scanner and its key strengths relative to the Artec Space Spider, namely, the high-resolution and automated 3D scanning powers of the Micro being a step beyond its handheld counterpart. While amazing for small objects like jewelry, the Artec Micro’s main limitation is its working volume, being unlikely to scan anything larger than a few inches in diameter. Because of this limitation, the Space Spider and the Micro share a large overlap in their Venn-Diagrams of high performance, and they are oftentimes working in “tag team” mode where the strengths of one system compliment the weaknesses of the other. Utilizing the Space Spider at maximum performance can produce a model nearly identical in form and function for many kinds of objects compared to the Artec Micro, and whether you are in the market to buy just one scanner or both, determining the best scanner to use for any given project is key.
In order to understand the appropriateness of one scanner vs. another, it is important to consider the purpose for the scan: what goal is being achieved? What is the minimum-viable-threshold for success? Is there a genuine reason to seek the highest possible resolution in a 3D scan, or can success be found prior to achieving the maximum possible quality? Many of these questions depend on time and money, but also on the possibility of unexpected future uses of any given 3D scan project. The highest quality 3D scan for a museum is likely to have much greater long-term value than a scan of something during the prototyping phase of new product design.
Below are some examples of several kinds of objects, where they have genuine differences in the purpose for scanning that would require consideration of higher quality scanning, and where each scanner would be best utilized.
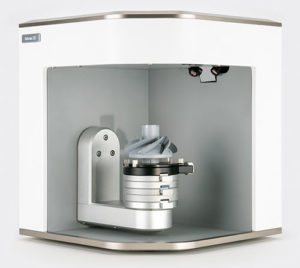 Artec Micro with tilt and turntable |
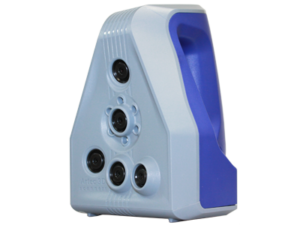 Artec Space Spider |
Example #1 – Household Key
If you were tasked with 3D scanning a household key, but without being given any other instructions or guidance, what would you guess is most likely the purpose for 3D scanning it? Is it to recreate the tooth profile to allow a duplicate to be made, in which the tooth profile is the defining critical area? Is it to design a custom part to fit, like a shadow tray, in which the overall shape without details is most important? Or is it to render in a 3D AR/VR environment, where the overall silhouette and color take center-stage?
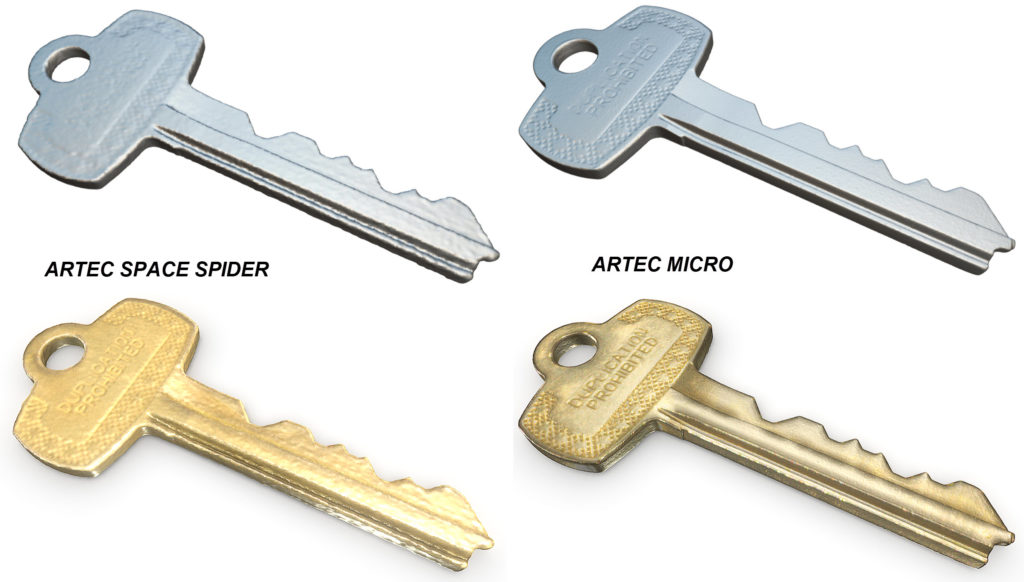
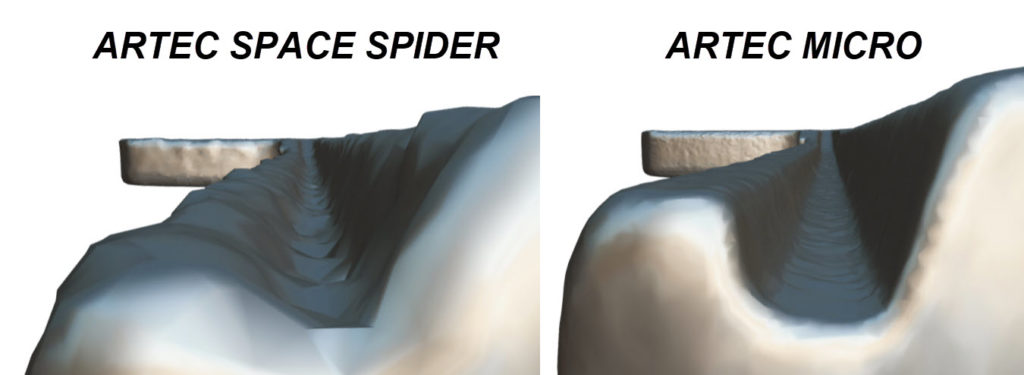
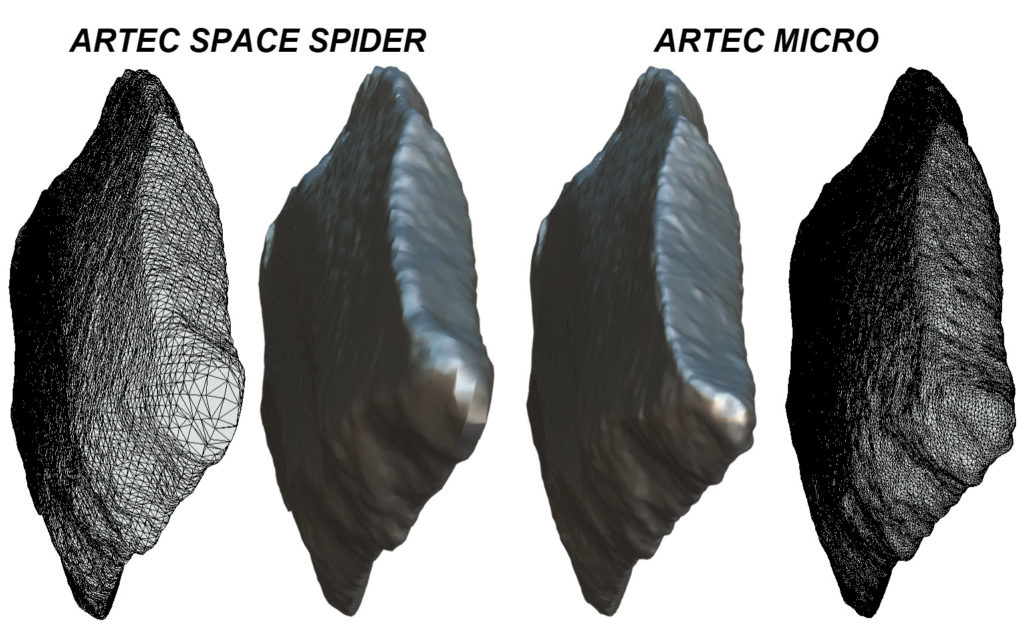
These questions are important in order to determine which scanner you’d want to use. If scanning for duplicating the key, then the key profile is correct and accurate for both models and so either scanner could be used, however if producing a novelty oversized key for some reason, then the higher resolution of the Micro data is much more important when scaling up. One common technique for evaluating the resolution of a model is to point the camera down a groove in the part, sort of like a “Death Star Trench Run” from Star Wars. As seen here, the key profile is correct and high resolution for both the Micro and the Space Spider scanners, however when the camera is pointed down the groove of the part, the lower resolution of the Space Spider becomes much more apparent and could be a liability.
In order to capture the highest resolution data on a key, 3D scan spray must be used as the material is shiny and prone to creating noise in the data. In addition, proactive use of Blue Tac material in creating a “part holder” to angle the key during scanning is important to create high-confidence 3D features for alignment that can overcome the thin walls of the key’s geometry.
Example #2 – Arrowhead
3D scanning an arrowhead is similar to scanning a key in that both are small, thin objects with a specific profile that has outsized importance relative to the rest of the shape. Arrowheads tend to have rich 3D geometry due to the tool marks caused by knapping a stone into the arrowhead shape, whereas a key has a higher proportion of “prismatic” surfaces: long sections of flat, planar areas, punctuated by sudden changes in straight lines. In addition, the manufacturing of a key is much more precise in the use of machine-tools, whereas an arrowhead is typically made by hand, and as such there is more human-caused variation in arrowhead shapes.
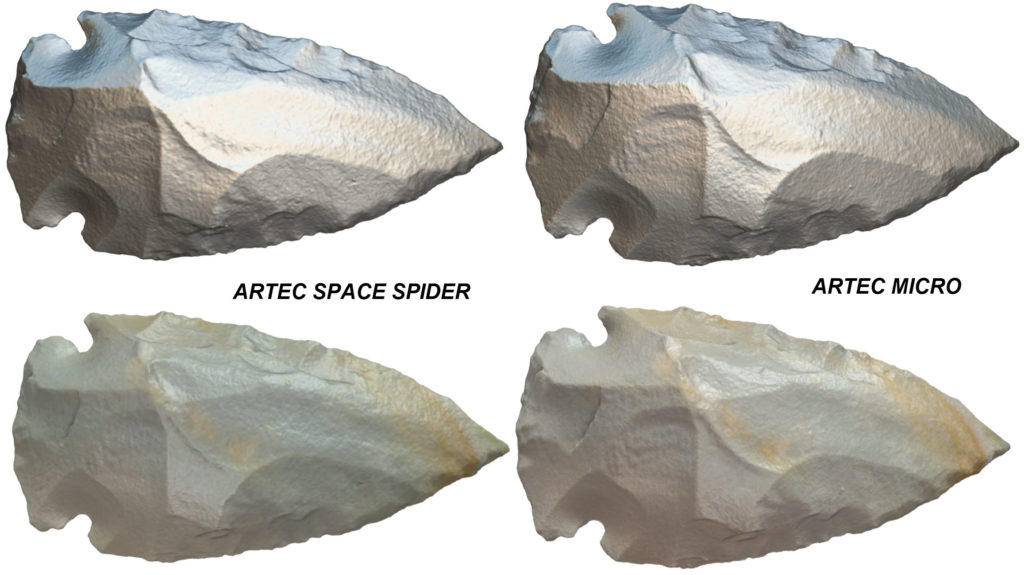
The purpose for 3D scanning an arrowhead is much more niche compared to a key – the possibility of using machine-tools to manufacture a duplicate key is much greater compared to an arrowhead. So why would an arrowhead need to be 3D scanned? For posterity? For airflow and/or structural analysis of its shape? For analysis and study of tool and hunting methods, patterns, and history? These questions tend to place greater emphasis on the exact shape of the arrowhead, but only up to a point. The Artec Space Spider and the Micro both excel at capturing the arrowhead shape shown here, and only minor differences in the tip and edge geometry can be found when comparing the two. It is hard to imagine any use-case other than historical archival that would see an appreciable difference in the two scans, so it is important to consider the potential and unknown future-use cases of 3D scanning. If scanning an arrowhead now with the Space Spider, consider if a higher resolution 3D scan within 5 to 10 years would be requested or even warranted, or if there’s any scholarly value in a higher resolution 3D scan.
Example #3 – Fossil
Consider what the high-resolution digital photography 20 years ago looked like, and compare that to modern day cameras used today. You might be thinking about how low resolution and pixelated images from 20 years ago looks! When capturing 2D images of fossils and other artifacts, there is an immediate and gut-level appreciation of higher resolution content: more pixels means more detail, which means more questions are answered, and more mysteries are presented and subsequently solved. Consider how many historical findings will never be fully appreciated due to the degradation of the item in between when it was first discovered and the modern-day technology. Apply this to 3D scanning, and there is a tendency to always look for the highest accuracy and resolution 3D scanners around. Unfortunately, most of the highest accuracy equipment runs in the 6-figure dollar price range and requires special training and facilities to utilize.
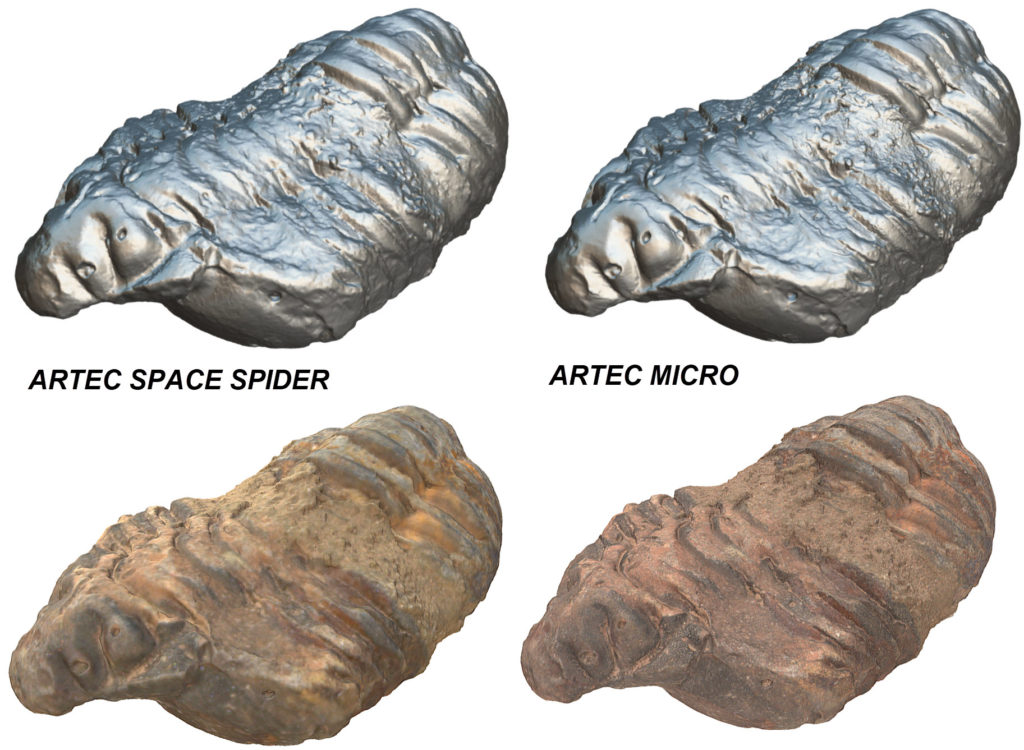
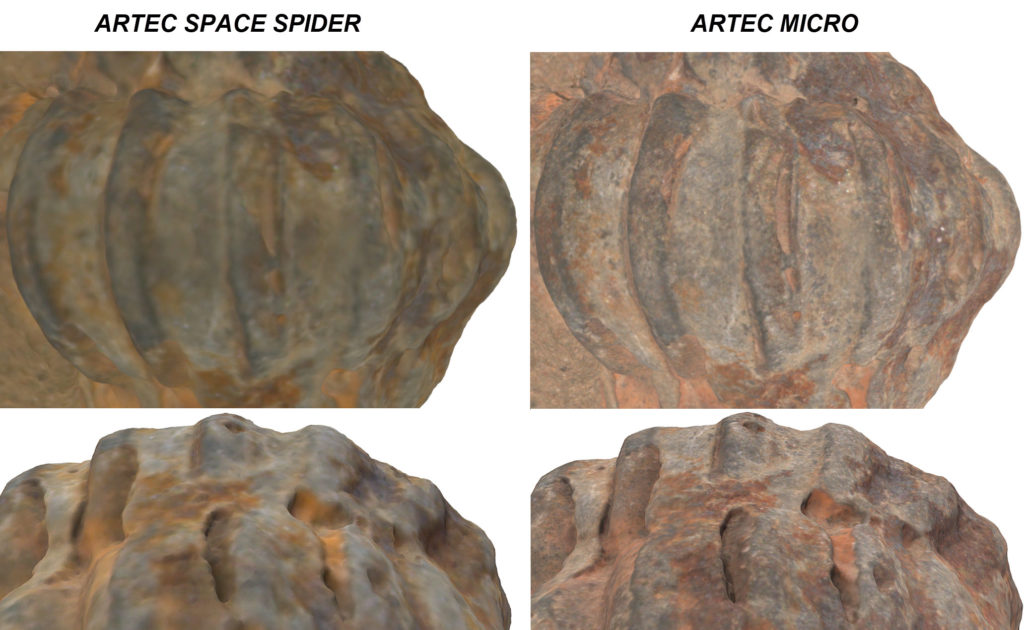
Fortunately for most museums out there, the Artec Micro is a perfect scanner that combines the low cost and ease-of-use of a handheld scanner with the high performance of a stationary high-end machine. Compared to the Space Spider, this fossil exhibits “night-and-day” difference in quality. From the increased 3D resolution showing more bumps, lumps, and undulations in the surface, to the increased color quality, the end result looks like a 3D model from a PlayStation 2 game that was remastered for the PlayStation 5. The Artec Space Spider is good here, but the Micro is amazing.
Example #4 – Turbine Blade
For many engineered and mechanical parts, the exact shape of the part is one step beyond necessary: it is central to the purpose of 3D scanning. Manufacturing the exact shape of a windmill blade, for example, is critically important in order to ensure the ability for the windmill to efficiently harness the wind to generated electricity. As another example, a small gear is critically important that it be rotationally symmetrical, so that it performs as the gear ought to and does not fail to engage the mechanical structure it is a part of. Contrast these shape-critical requirements to a 3D scan of a household key which has elements of predictability to the shape: if the profile on one of the teeth looks a little ragged, those defective areas could be ignored and compensated for during the CAD design and manufacturing process. A turbine blade for a jet engine is more similar to a gear than a key when evaluating the purpose of the 3D scan.
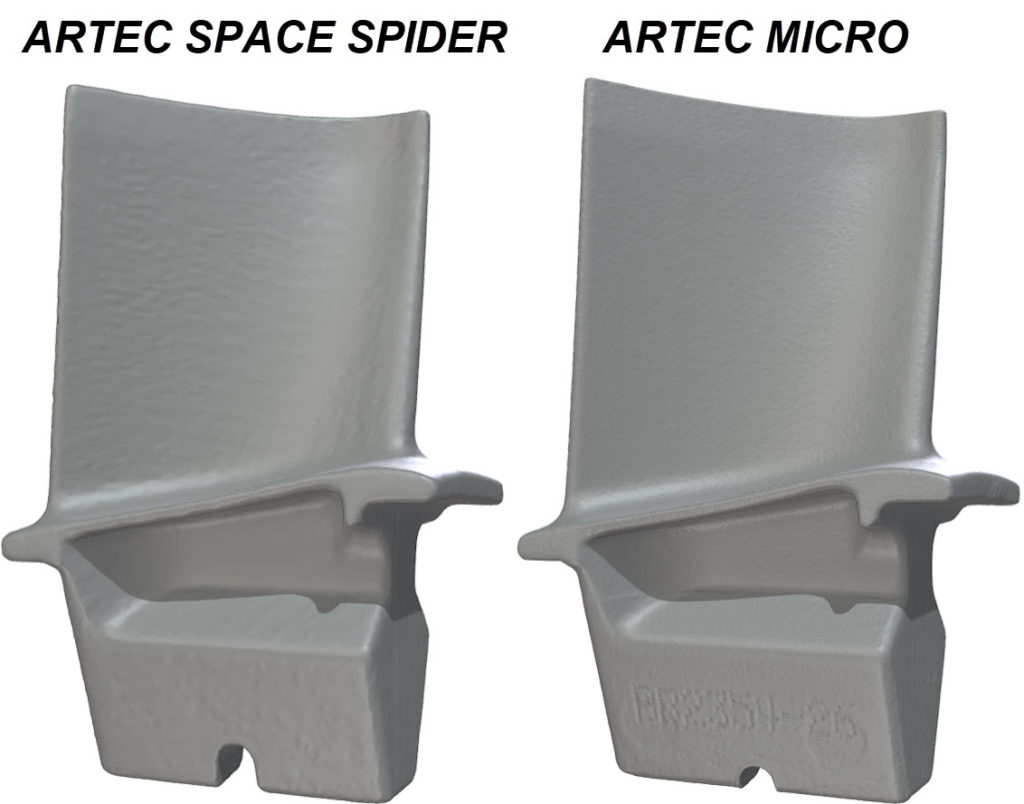
In the 3D scanning world, a turbine blade is a “Performance Part” in that the exact shape is leveraged to achieve a specific objective and where deviations from the ideal shape can cause performance as well as safety concerns. Performance Parts are typically much more important to 3D scan with the highest possible quality, so that the function and safety of the final assembly is not compromised (in the case of a turbine blade: the performance of the jet engine and thus the plane itself). Putting it simply: a mistake in 3D scanning a key is not likely to endanger anyone’s lives as much as a mistake in 3D scanning a turbine blade.
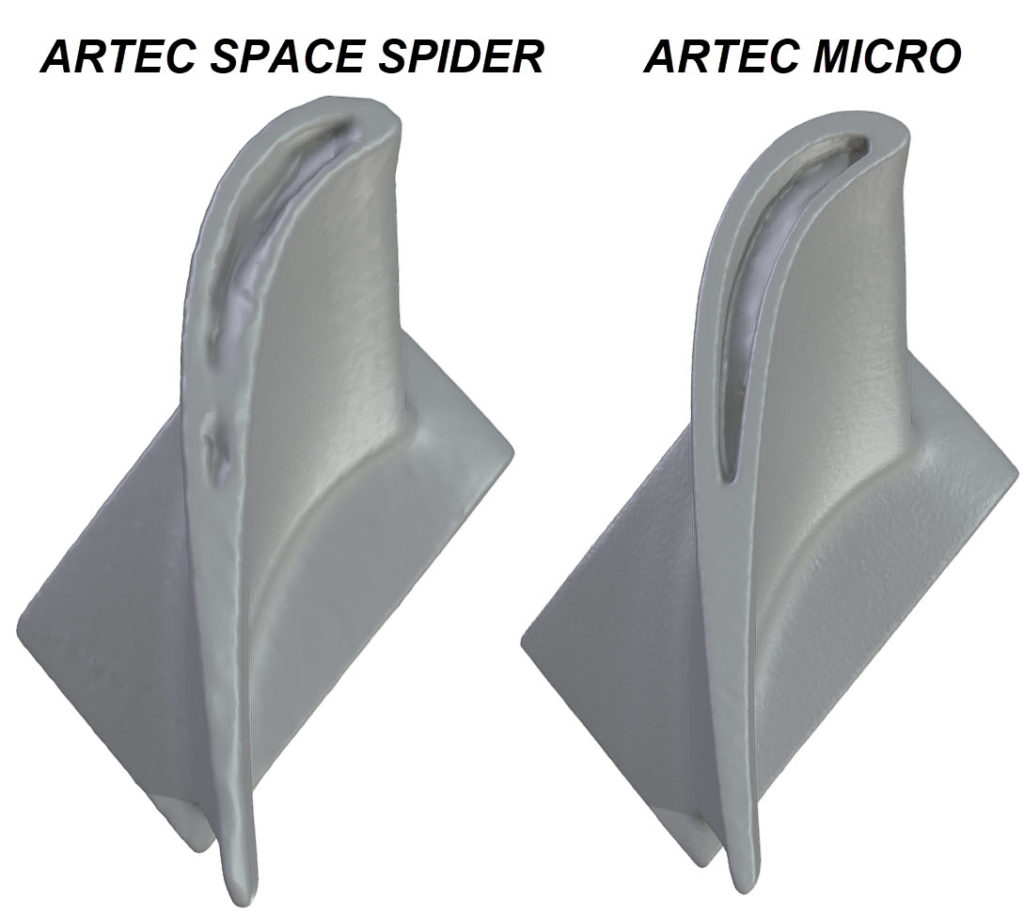
As you can see here, there is an undeniable similarity between the 3D scan of a turbine blade with the Space Sider and the Micro, however a closer examination reveals areas of internal structure where only the Micro is able to detect and thus measure the wall thickness. In addition to the greater feature resolution, the Micro has much greater accuracy. When manufacturing a part with +/- 0.001” precision, it is important to 3D scan such parts with equivalent or better accuracy, and the Artec Micro reaches and exceeds this target, whereas the Artec Space Spider tops out at around +/- 0.002” and is simply not at the accuracy level required by the part and its requirements for success.
| Artec Micro | Artec Space Spider |
Sample file downloads are available here >
Wrapping it Up
Artec 3D has dramatically increased their capabilities in 3D scanning small objects with high detail in recent years, and it is these kinds of small objects with unique details and reasons for scanning that have pushed Artec to continue to innovate in new hardware and new software solutions and improvements. The release of the Micro and yearly updates to Artec Studio software have made it easier than ever to achieve better than +/- 0.001” accuracy 3D scan results without breaking the bank or requiring high skill technicians.
Happy scanning!
