Best of Both Worlds: Artec Eva and Space Spider
If you own an Artec 3D scanner, then you’ll know each scanner is designed with a general range of part sizes in mind. For example, the Artec Eva and Leo are amazing at scanning large objects like furniture but are unable to capture small objects like jewelry. Conversely, the Space Spider has a resolution high enough to scan jewelry—but the small field of view makes it not suitable for scanning larger objects like vehicles.
You might be wondering: is it possible to combine data from two different Artec scanners to get the best of both worlds?
The answer is yes! There are several ways to combine 3D scan data, and this article will cover techniques and workflows for how to do this on a wooden chest with brass handles.
Double Trouble: Overcoming 3D Scanning Challenges
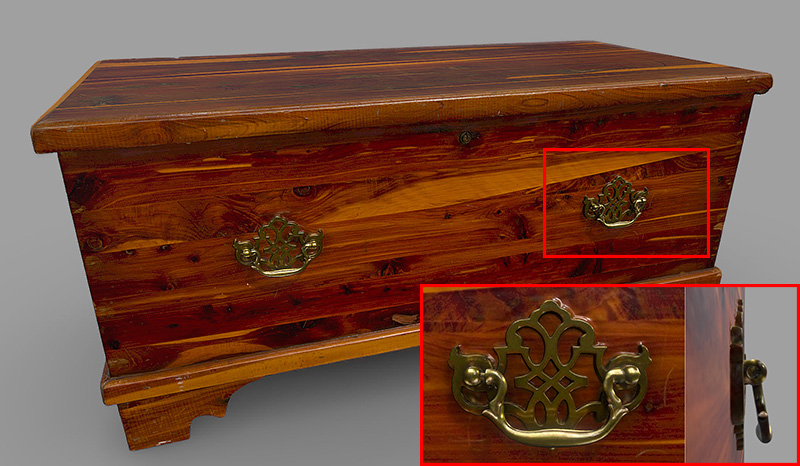
The example for today is a cedar chest with ornate brass handles. The chest measures approximately 35x16x15 inches, meaning it can be scanned with the Artec Space Spider alone. However, the large surface area of the part combined with the relatively small field of view of the Space Spider means it will feel like mowing a football field with a push mower—not the best tool for the job. A better technique is to scan the entire chest with the Artec Eva and scan only the high-detail areas with the Space Spider.
The most important thing to know about combining 3D scan data is that there is no single correct method for accomplishing your goals. There are, in fact, multiple methods of combining data, depending on what other third-party software you have access to. This blog will cover Artec Studio methods of combining data.
Before starting any 3D scanning effort, it’s best to brainstorm ways this scan could result in a poor-quality model. Here are the top hurdles anticipated during this chest scan:
- The handles will move. If the chest needs to be flipped upside-down, the moved position will need to be reconciled.
- The lid moves slightly, so care will be needed to ensure it is not bumped and moved during scanning.
- The brass handle detail is very shiny, so the best results will come only if 3D scan spray or talc spray is used on the shiny metal surfaces.
- The wood was cleaned with dust cleaning spray, making the surfaces very shiny and glossy. The scanner will need to be held at a slight angle to ensure the bright white light doesn’t cause a troublesome amount of glare.
- The chest appears sturdy and rigid, but it may slightly flex when tipped on its side.
Individually, these considerations are not a problem—but together, they present a challenge.
Sometimes, More Is More: The 3D Scanning Process
3D scanning a large chest, unlike a small toy, requires a lot more movement on the part of the operator. It is not possible to scan this chest while lazily sitting at your desk. For this project, the chest was elevated on a wooden stool so that it wouldn’t touch the carpeted floor during scanning.
Here is the list of the total number of positions that were scanned:
|
Position 1: Standing (Artec Eva) |
Eight scans with the Eva were taken while the chest was in its upright position. For a colorless scan, this could have been shortened to only three. For this scan, color was important, and that means holding the scanner in a way that avoids glare. It takes more effort to do this, so splitting the scan into pieces was easiest. The six scans are: [Side 1], [Side 2], [Side 3], [Side 4], [Top 1], and [Top 2]. |
|
Position 2: Underneath (Artec Eva) |
The second position was flipped upside-down, and two scans were taken with the Eva—one to capture the detail underneath the legs, and a second to hold the scanner at the optimal angle for color capture. These were labeled [Under 1] and [Under 2]. |
|
Position 3: Handles-Up (Artec Space Spider) |
The final position was the chest on its side, handle-side up, and scanning with the Space Spider to capture the most details. Pea-sized blobs of putty were placed on the sides of the handle to force it to stay upright, fully exposing the details. 3D scan spray was used to ensure the details scanned with as little noise as possible. The three scans here were: [Right Handle Up], [Left Handle Up], and [Lock]. |
|
Position 4: Standing (Artec Space Spider) |
After scanning the handles upright while sprayed with talc, the chest was once again placed in an upright standing position, and the handles were scanned a second time with the Artec Space Spider. These extra scans will work to capture the natural position of the handles. Name these [Right Handle Base] and [Left Handle Base] |
In a previous blog covering fixing a part that moves during 3D scanning, two important preliminary steps were identified, and they should be repeated here:
- Run Global Registration on each individual scan.
- Use the Align tool to orient all three positions together.
- Re-run Global Registration on everything together.

Left – All Scans, Middle – Top and Bottom, Right – Fully Aligned
Once the main structure of the chest is registered and aligned (Top, Sides, and Under scans), the next step in assembly is managing the Artec Space Spider data. What makes things extra complicated here is that we have captured the handle not just from one side, but from both, and we have an extra scan of the handles in Position 4 to align them to.
In order to combine this 3D scan data, we need to duplicate the upright handle data to separate the handle from the base and allow it to be repositioned.
The order of operations to merge the handle via duplication is as follows:
- Run Global Registration on all scans within each position. Note: it is very important the global registration is done well here—using high key frame ratio—as this will be the last global registration performed on these Spider scans.
- In the workspace, right-click and hit Duplicate [Right/Left Handle], which will result in new layers for each. Rename them Right/Left Handle and Right/Left Detail to make it simple.
- Use the Eraser tool to delete the detail from the handle layers.
- Use the Eraser tool to delete the handle from the detail layers.
- With each segment isolated, saved, and labeled its own layer, run the Align tool to align each segment to the base position layers [Right Handle Base] and [Left Handle Base].
- Align the handles to the Eva data.

Handle Alignment
Bridging the Gap: Combining Our 3D Scan Data
After global registration, the final step is fusion. In this case, we have a mixture of Eva and Space Spider 3D scan data, so there should be more scrutiny when this is performed.
There are three main methods of generating a high-quality mesh that combines the high-resolution Space Spider data with large-volume Eva data.
The first method is to simply run fusion normally. That’s it. Just run fusion—but you have to specify a max resolution of 0.5 mm, because that’s what the max resolution of the Eva dataset is (think: lowest common denominator).
The second method is to create individual fusions for the Eva and Space Spider datasets, and then run another fusion with the result of those. This can result in defects if there’s subtle movement you didn’t keep track of. For example, the chest walls slightly bowing when the object was turned on its side, causing a change in shape.
The final method is to create individual fusions, delete a small space in the flat areas around the detail, merge the meshes, bridge and hole fill. That’s a lot, so here’s a step-by-step of what to do:
- Run Sharp Fusion on each set of Space Spider scans of the handles and lock.
- Run Sharp Fusion on all Eva data.
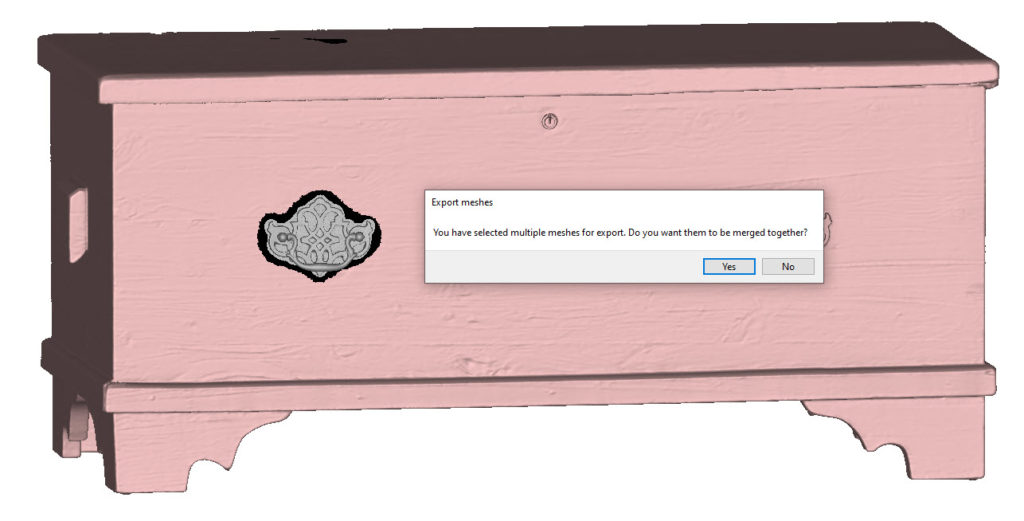
- Use the Eraser tool to select a “moat” of flat area around the handle detail, and delete. This should create an “island” of Space Spider data surrounded by Eva data, with a small 3-10 mm gap of erased data surrounding it.
- With all fusions selected, export them as an STL mesh. A dialogue box should display the message: “You have selected multiple meshes for Export. Do you want them to be merged together?” Select “Yes.”

- Import the newly exported (and merged) mesh.
- Use the Fix Hole tool to create a series of bridges around the perimeter of the hole.
- Use the Fix Hole tool to fill the remaining holes in between the bridged areas.
- Use the Smooth brush in the Editor tab to smooth over any jaggedness.

Bridging and Smooth Brush
The Final Product

With these methods, we can produce an extremely high-quality mesh that combines the best of the Eva data with the best of the Space Spider data, and the resulting mesh shows a high-quality handle that has appropriate details and color—even on the interior side. Please practice these techniques, and as always, happy scanning! Should you have any questions about Artec 3D scanners or combining scan data, don’t hesitate to contact Laser Design today.
